Showing posts with label celebrations. Show all posts

Tuesday, December 18, 2012

A Christmas Wedding

I was honored to design some decor for my friend Jen's Christmasy wedding this past Friday evening. The day was busy-busy-busy, but I made myself take a few minutes to photograph the auditorium and reception table decor...or I knew I'd be kicking myself afterward. =)

Everything we did was pretty simple but very festive - and it suited the couple perfectly. Both Jen and her new husband Jonathan love to read, so we brought some books in as part of the design.

We borrowed these hardback books and created dust jackets from tone-on-tone metallic wrapping paper.


I also used the wrapped books in the centerpieces for the reception tables. Instead of a poinsettia atop the stack of books, though, I filled glass bowls with coordinating Christmas balls and silver tinsel. Could it get any easier??


The auditorium pew markers also contained an element of the reading love theme. 


Using plain white (previously ugly) shatterproof ornaments, I modpodged strips of text from an old book (The Amy Vanderbilt Book of Etiquette, if you must know - and I totally enjoyed reading snippets of it while I was working on this project! Pretty hilarious.) onto them and then sprinkled clear and silver glitter to finish it off. It only took a bit of time - it wasn't difficult at all - but it was a great little touch, I think. Plus, they can be used for Christmas ornaments afterwards. I love that whole two birds/one stone thing. =)


Here's what the stage looked like. We taped icicle lights to the glass in front of the baptistry and covered them with white sheer curtains. I arranged a little semi-circle of poinsettias for Jen and Jonathan to stand in front of. I cannot wait to see the wedding photographer's pictures of the ceremony! The wedding was at 5:00pm, so the lighting was completely different than when I was snapping these pics. 


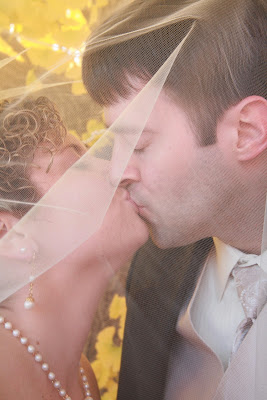
And here's one sneak peek shot from Starla Photography (she's fantastic - she shot our wedding, too!) I seriously cannot wait to see the rest of the pictures!


(Yes, I made that bouquet and boutonniere. Yay!)

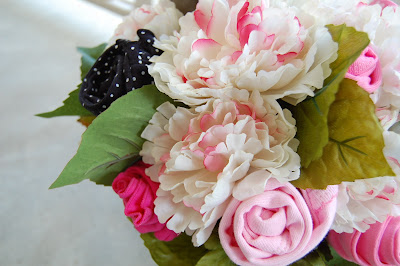
Oh, and hey, here's another shot from Starla - I loved how the wedding colors turned out!


My friend Ashley made the wedding cake and it was both beautiful and so delicious. Yum! (Plus, she took this lovely picture of it.)


Happy Wedding, Jen and Jonathan! May God bless you guys with a long and very, very happy marriage! =)


Wednesday, November 23, 2011

Autumnal Cheer: Thanks Living


First of all, if you like hot tea and/or pumpkin spice flavored things, you need to check out this Bigelow Pumpkin Spice tea. Mmmm! My mom surprised me with it - and it is goo-ood. I think she bought it at Kroger...

Next of all, I have really enjoyed celebrating Thanksgiving all month by expressing gratitude in a series of Facebook stati (or statuses - what is really the proper term??) Though I didn't post every day this month, I wanted to pull together my list here in celebration of the actual day. It's a long, happy list - and I fully intend to keep expressing gratitude even when November is over. Hence, the title...Thanks Living. See what I did there? ; )

November 2nd: Today I'm thankful that God gives us stunning autumn colors in the form of pumpkins and pretty mums and changing leaves. I highly recommended walking (or driving) through the falling 
leaves and thanking God, right then and there, for his beautiful autumn idea.

November 3rd: Today I'm thankful for our families, who love to cook and laugh and spend time together. All year long, but especially around the holidays!

November 4th: Today I'm thankful for both a husband and a daddy who can always fix *anything* around the house! Right now Jeremy Hicks is replacing the rails and spindles on our side porch and it's looking SO good.

November 5th: Today I'm thankful for a brilliant Creator who inspires us to design and create things ourselves, just on a much smaller scale. =)

November 6th: Today I'm thankful for a sunshiney Lord's Day. Time to finish getting ready for worship! =)

November 8th: Today I'm thankful for a sweet, sneaky husband who surprised me with flowers and a card that made me cry happy tears before he left for work this morning. Happy third anniversary, Jeremy Hicks! =)

November 9th: Today I'm thankful for tastebuds and favorite flavors, mixed in lots of variations: basil, cilantro, chocolate, browned butter, garlic, lemon, roasted red pepper, olive oil, sesame, rosemary, vanilla, pumpkin, cranberry, parmesan. So many lovely flavors that God created!

November 10th: Today I'm thankful for words...the way they can paint pictures, express ideas, capture imaginations, and inspire to action!

November 13th: Today I'm thankful for so many Christian friends and family - you all encourage me, challenge me, and make the journey to Heaven *so* much more fun!

November 15th: Today I'm thankful that K-Mart, of all places, has PINK tinsel. Wait, change that to "had." I bought every bit of it - and then said a silly little prayer of thanksgiving in the parking lot that I'm quite certain God didn't think was silly at all. Pretty sure we're supposed to be grateful for the little things, too! =)

November 17th: Today I'm extremely thankful for all of these precious babies who have been born safe and healthy this year - Elijah (Ashley & Ethan), Tyler (Andrea & Paul), Ethan (Alyssa & Michael), Ellery (Ashley & Jason), Shelbie (Allison & Adam), and the latest of them early this morning - Adelae  (Sasha & Jared)! I am blessed to know you and yours!

November 18th: Today I'm thankful for fun holiday traditions. I'm ready to go to the Holiday Merchandise Mart with my mom a little later this morning!

November 19th: Today I'm thankful for the inventors of the hot glue gun, Bare Escentuals makeup, my electric kettle, and white chocolate popcorn.

November 22nd: Today I'm thankful for Better Homes & Gardens' Fresh Frasier Fir (not Fur) candle, for list-making tendencies, and for colors...especially red.

November 23rd: Today I'm thankful for a long table filled with yummy pizzas, visiting friends, and much laughter at Besso's last night. Sorry, we were the loud ones. =)

November 24th: Today I'm thankful for hope and grace and God's promises. Amen!

There's one more thing, though. I'm thankful for you, dear blog readers. I love that you come here and read what I write. I love that you encourage me on Facebook or in person. I really appreciate you, whether I know you in "real life" or not. I hope you have a simply fantastic Thanksgiving!

What are you thankful for? =)

Thursday, November 17, 2011

Autumnal Cheer: There's a Tear in My Butterbeer


Yes, I made these cupcakes back in July, for tear-stained consumption after the premiere of the very last Harry Potter movie. No, I haven't posted about them until now - I didn't have time, for some reason or another. But - really - it's more appropriate even now. See, HP and The Deathly Hallows 2 was just released on DVD...and also, these cupcakes totally remind me of autumn. They were truly fantastic! Exceptional, even. I remember thinking the flavors would be perfect for Halloween or Thanksgiving, even though they (gasp!) don't involve pumpkin. Our friends Bethany, Mindy, and Brad were big fans of these cupcakes also, and they don't hand out compliments easily. Or...maybe they do, but I'm just trying extra hard to convince you how wonderful they are. You should make them - even if you've never HEARD of Harry Potter. (Who ARE you??!) You won't be sorry. Also, you should read the books. You won't be sorry. And you should watch the movies. Warning: sometimes you'll be sorry. They definitely got better with each installment.

I definitely wore my owl necklace that my friend Sasha made for me. 
And Jeremy accidentally wore his Ooltewah Owls T-shirt; I pretended that it was on purpose.

Brad and Mindy. Yes, we saw the Deathly Hallows in 3D, with Harry Potter glasses. 
Yes, they made their own (awesome) shirts. Brad's shirt is the funniest HP shirt I've ever seen!

Bethany and me. Sorry for the totally awful quality of this picture. 
The lighting in the movie theater lobby was questionable, at best. Why couldn't they have had some 
of those huge umbrella things like wedding photographers have? It's the least they could do.

Let's get back to the sweet stuff. This recipe came straight from amybites.com, who did a marvelous job creating it. I highly recommend that you go to her original post and follow all of her little tips and tricks. I usually have lots of extra notes on a recipe, but she was so thorough that I actually have nothing else to add! It's perfect, as is. =)


Butterbeer Cupcakes
Makes 18 

For the cupcakes:
.
2 cups flour
1 1/2 teaspoon baking powder
1/2 teaspoon baking soda
1/4 teaspoon salt
1/2 cup (1 stick) unsalted butter, softened
1/2 cup granulated sugar
1/2 cup dark brown sugar, packed
3 large eggs
1 1/2 teaspoon vanilla
1 teaspoon butter flavoring
1/2 cup buttermilk
1/2 cup cream soda
.
For the ganache:.
1 11-oz. package butterscotch chips
1 cup heavy cream
.
For the buttercream frosting:.
1/2 cup (1 stick) unsalted butter, softened
1/3 cup butterscotch ganache
1 teaspoon vanilla
1 teaspoon butter flavoring
1/8 teaspoon salt
1 16-oz. package powdered sugar
Splash of milk or cream (as needed)
.
For the cupcakes: Preheat the oven to 350 degrees and line cupcake pans with paper liners. Combine your flour, baking soda, baking powder, and salt in a bowl and set aside. In a large bowl, cream your butter until light and fluffy. Add your sugars and beat until well-combined. Beat in your eggs, one at a time, mixing well after each addition. Then beat in your vanilla and butter flavoring.
.
Alternate adding your buttermilk, cream soda, and dry ingredients in batches until all are well incorporated. Fill each cupcake liner 3/4 full, then bake for 15 to 17 minutes until a tester inserted into the center comes out clean and cake springs back to the touch. Cool completely on wire racks.
.
For butterscotch filling: In a double boiler (heat-proof bowl over a pot of simmering water on the stove), combine butterscotch chips and heavy cream and stir until completely combined and smooth. Cool to room temperature. Fill a squeeze bottle with ganache and insert into the center of each cupcake, squeezing until filling begins to overflow.
.
For buttercream frosting: Cream butter in a large bowl until fluffy. Add in ganache, vanilla, butter flavoring, and salt and mix until well combined. Beat in powdered sugar 1 cup at a time until reaching desired consistency. Add milk or cream by the Tablespoon as needed. Frost cupcakes and top with a drizzle of butterscotch ganache.


Tuesday, November 8, 2011

A Third (and Fourth) Anniversary


Happy third wedding anniversary to my husband, Jeremy. Today, I'm remembering the chilly weather...our excited friends and family gathering around us...the huge yellow gingko tree...the white pumpkins and yellow mums and red berries...the song the bridesmaids walked down to...the hot apple cider and that delicious almond wedding cake...the feeling of finally wearing my wedding dress...and finally seeing my handsome groom. As everyone always says, the day passed too quickly, but I was glad somebody had told me it would. Because I made sure I was fully in the moment during our ceremony. I remember what my grandaddy said and what my daddy said...and what you and I promised each other. I wasn't nervous. I was calm. 

During the three years since, I haven't always been so calm. Because THE WEDDING, decidedly, is not what a marriage all about, even if the magazines and the blogs make it seem that way. It's about real life, day to day. And reality is messy and confusing and difficult. But when you're there, holding my hand through it all, I know that calm once again. The feeling that comes over me and tells me that we're right together. That even though we don't have everything in the world in common, we do have the most important things in common. And today, we're celebrating that. =)

In fact, we're celebrating an extra year of such, because we met four years ago this very week. So, in addition to the wedding details, I'm remembering seeing "Beauty and the Beast" in Loyd Auditorium and eating taco soup with Megan and Mark...I'm remembering you repairing my broken necklace and us sitting knee to knee at the FHU Homecoming basketball game. I'm remembering a nervous first kiss before you headed back to Chattanooga. And I'm remembering that before you came back to visit in another two weeks, I already knew you were "The One." Exactly one year later, we got married. 

It's been beautiful - not just the wedding, but the process of our lives getting entwined. I love you, with much love, always! Thank you for asking me to be your wife.


Monday, October 17, 2011

Baby Shower Onesie Bouquets


This past Saturday, our sweet friends Ashley and Jason welcomed their first baby into the world. We are so excited for all three of them and know that they'll be awesome parents to little Ellery Kate. (Her name is pretty great, right?? I think it's lovely.) Most likely, this little one will grow up to have a quick sense of humor, along with a love for others, especially those in need. She'll be smart and crafty and organized and a good worker. She'll probably make a mean cupcake. And of course, she'll be stinkin' cute, because Ashley and Jason are such a handsome couple. =) Right away, she'll be very well dressed. The outpouring of love in the form of an incredible number of gifts and guests at their church baby shower was a great indicator of how much people think of Ashley and Jason. We are fortunate to count them as close friends.


I was honored to help hostess this baby shower in September and I offered to do the decorations. So, thanks to Pinterest for this sweet idea...a fun baby shower gift that's, at once, decorative - and ultimately, pretty useful also. I've now made two of these - one for Ellery Kate and the other for another "first baby" for our good friends Sasha and Jared. (Her name will be Adelae Grace; my friends are picking some superb names lately!) Both projects were incredibly fun and fairly quick. Bonus! (Speaking of Pinterest, I hope to have a Pinterest button on the blog soon...it's in the middle of a autumn redesign, which I'm pretty excited about. Woo hoo!)

A funny story involving this project...I got a thank you note from Ashley after the shower and I handed it to Jeremy to read. At one point he paused and said, "She's using words I don't even know! O-niece? O-nee-see?" I couldn't *imagine* what he was talking about, but after a quick peek at the note, I started laughing hysterically. I guess Jeremy had never seen the word "onesie" written out...

I shared that story on Facebook a few weeks ago and my friend Lindley said her husband had sounded it out the same way...and then said, "I guess I'm looking at the Spanish side of the package..." Oh, the laughter!!


Onesie Bouquet Tutorial

Materials needed:
*medium-sized flower pot...any color and design you wish!
*styrofoam block
*knife or box cutter (for cutting styrofoam)
*hot glue gun (I highly recommend a low-temp one)
*heavy floral wire covered with floral tape (needs to be sturdy; these will be the stems)
*wire cutters
*assortment of baby onesies/matching pants, baby washcloths, and/or baby socks (all in the same color scheme). I used three sets of onesies/pants, three onesies or pants in each set.
*one bunch of "permanent flowers" with plenty of leaves attached
*floral tape, preferably green

Instructions:
1. Heat up glue gun; cut styrofoam into two smaller blocks that will fit (one on top of the other) into the pot. Glue pieces together, mainly on the edges. You don't want to make it it impossible for the floral wire to pierce through a thick smear of hardened glue. Attach the styrofoam pieces into the pot, pressing down well until adhesive is dry and blocks seem sturdy.

2. Cut floral wire to desired length. I think mine were about 9-10 inches long. Make a small loop at one end; this will help anchor the onesie rosette and also help keep it from snagging the fabric. (Good idea, Jeremy.)

3. Lay first onesie upside down and fold both sides over, much like tucking the sleeves back when folding a shirt. Place first piece of floral wire (loop side up) on the tush-side of the onesie and start rolling it up, fairly tightly. When you've finished rolling it, secure with a generous strand of floral tape. (If you've never used floral tape before, it works best when pulled and wrapped at the same time - it only becomes sticky when it stretches and then sticks to itself.)

4. Insert onesie rosette into the styrofoam. Continue making the rosettes and arranging them in a pleasing color pattern into the pot. Take care to not pierce any fabric with the floral stems.

5. After the onesie rosettes are completed and placed, cut several of the "permanent" flowers and insert them into the arrangement for visual interest. You will want to cut off the leaves from the stems and tuck them around the edge of the pot  to cover any of the floral tape. Tuck a few leaves into the middle of the arrangement, too, if you have enough. I did not anchor these with glue or anything because it's a temporary arrangement. I had no problem transporting it with everything staying in place. =)

6. Admire your handiwork and take some pictures you "secretly" hope will end up on Pinterest. ;)


Coming up soon...more baby shower projects! 


Monday, September 26, 2011

A Wedding One Year Ago


On a warm, late-summer day one year ago this past weekend, there was a pretty outdoor wedding. The groom was my cousin Adam. This guy can usually be found at Four Seasons Nursery (where he loves helping people with their landscaping quandaries) in Carhartt overalls, sunglasses, and a cap. But on that day, his bride Tosha talked him into wearing a tuxedo - and he looked pretty handsome, don't you think?

Tosha, of course, was pretty beautiful herself. Our family is blessed that Adam found her! I knew it was going to work out when I first heard Tosha doing a spot-on impression of Adam. The same Adam who is usually the one doing the hilarious, spot-on impressions of other people. Yes. It was pretty awesome.

Oh! Let me show you one of their engagement picture that was perfect. See, Tosha teaches spin and weight classes and she's won first place (thankyouverymuch) in a fitness competition last year. And I already told you about Adam, so this picture is very appropo. I love it!


Here's some more pictures from the wedding. Jeremy and I took turns taking these...

Grandaddy performed the wedding. =)

Bless her heart. Tosha's niece Tessa was exhausted 
and slept through most of the wedding on my lap. 
As the wedding director, I was just so glad to get her down the aisle! Ha!

Adam's sister Beth and good friend Josh - or Jug, as he is called in real life.

My dad and I designed the programs. =)

Cousin Nick and Aunt Claudia, who got an "empty" program. 
Now, some volunteers in our family hand-folded those...who left this one in there?? Ha!

Pretty cake!

Pretty girls!

Jeremy and me with the happy couple

Happy Anniversary, you guys! You might have already found out that the first year of marriage is both blissful and frustrating. We remember. ;) And we're cheering you on. Love you both! May you have many more very happy years together. =)

Friday, July 22, 2011

Radish Chive Tea Sandwiches with Sesame and Ginger


Not very long ago, I wasn't so sure I liked radishes. Luckily, my friend Bridget surprised the tea party committee with this intriguing tea sandwich recipe and everything I thought I knew about radishes vanished into thin air. Every one of us loved the slightly spicy taste of these and the general prettiness of the radish rounds decorating the top. It was a perfect addition to our tea menu this year!


Radish-Chive Tea Sandwiches with Sesame and Ginger

Yield:  Makes 16 servings

Ingredients:
4 tablespoons salted butter, room temperature
3 tablespoons minced chives, divided
1 tablespoon toasted sesame seeds
¾ teaspoon peeled and grated fresh ginger
¼ teaspoon Asian sesame oil
salt and pepper, to taste
3-4 radishes, thinly sliced

Mix butter, 2 tablespoons chives, sesame seeds, ginger, and oil in small bowl; season with salt and pepper.  Spread butter mixture over each bread slice.  Trim bread into desired sandwich shape, such as squares or rounds. Top with radishes, overlapping slightly. Sprinkle with remaining chives. Serve sandwiches open-faced.

Recipe adapted from http://www.epicurious.com/recipes/food/views/Radish-Chive-Tea-Sandwiches-with-Sesame-and-Ginger-241846

Friday, May 13, 2011

The Tea Boutique


I've just got so many fun things to tell you about the tea party this past Saturday, but well, it's gonna be a little at a time! The first thing that I want to go ahead and let you in on is an online shopping opportunity. We did great with our Tea Boutique sales, but we've still got some fun items to offer: fancy teapot jewelry and intriguing Tea Shop Mystery books and cute handmade tea cozies. And, well, two kinds of tea. Of course!


Usually we just pack everything up and sell it next year, along with some newer items, but I thought I'd try an online sale for a bit. Especially since we're still trying to meet our fundraising goal for student scholarship giving. May 31st marks the end of our fiscal year, so if you're interested in purchasing anything, just go right ahead and let me know what you want! =) And since all profits go toward FHU student scholarships, if you're interested in making an extra (tax deductible) donation, we'd be glad to help you with that, too.

We're not in the online selling business really, so send me a message at victorianteaparty@fhu.edu to ask about shipping and payment options. We'll do our best to use the most cost-effective shipping prices. And now...here's the link to the Facebook album entitled 2011 Tea Boutique. If you'll notice, I had a little fun with the merchandising. ;)