Yes, it's only September 5th and it's still hot outside in Tennessee, but I'm pretty ready for fall. Ready to pull out the colorful leaf wreaths and buy some funky pumpkins and drink some chai tea. Oh, and try new pumpkin recipes! Yes, please.
This is a different sort of pumpkin recipe than I usually try - it's a savory one. And I loved it! It messed with my husband's mind a bit ("I keep wanting it to be sweet!") but it was a total win for me. It's a pretty healthy recipe, too, though I added a bit more cheese and salt than the original recipe called for. I mean, you want it to taste good, right? ;)
Oh, and don't be looking for "pumpkin beans" at your farmer's market like my mom's cousin was going to do. It's pumpkin comma bean. =)
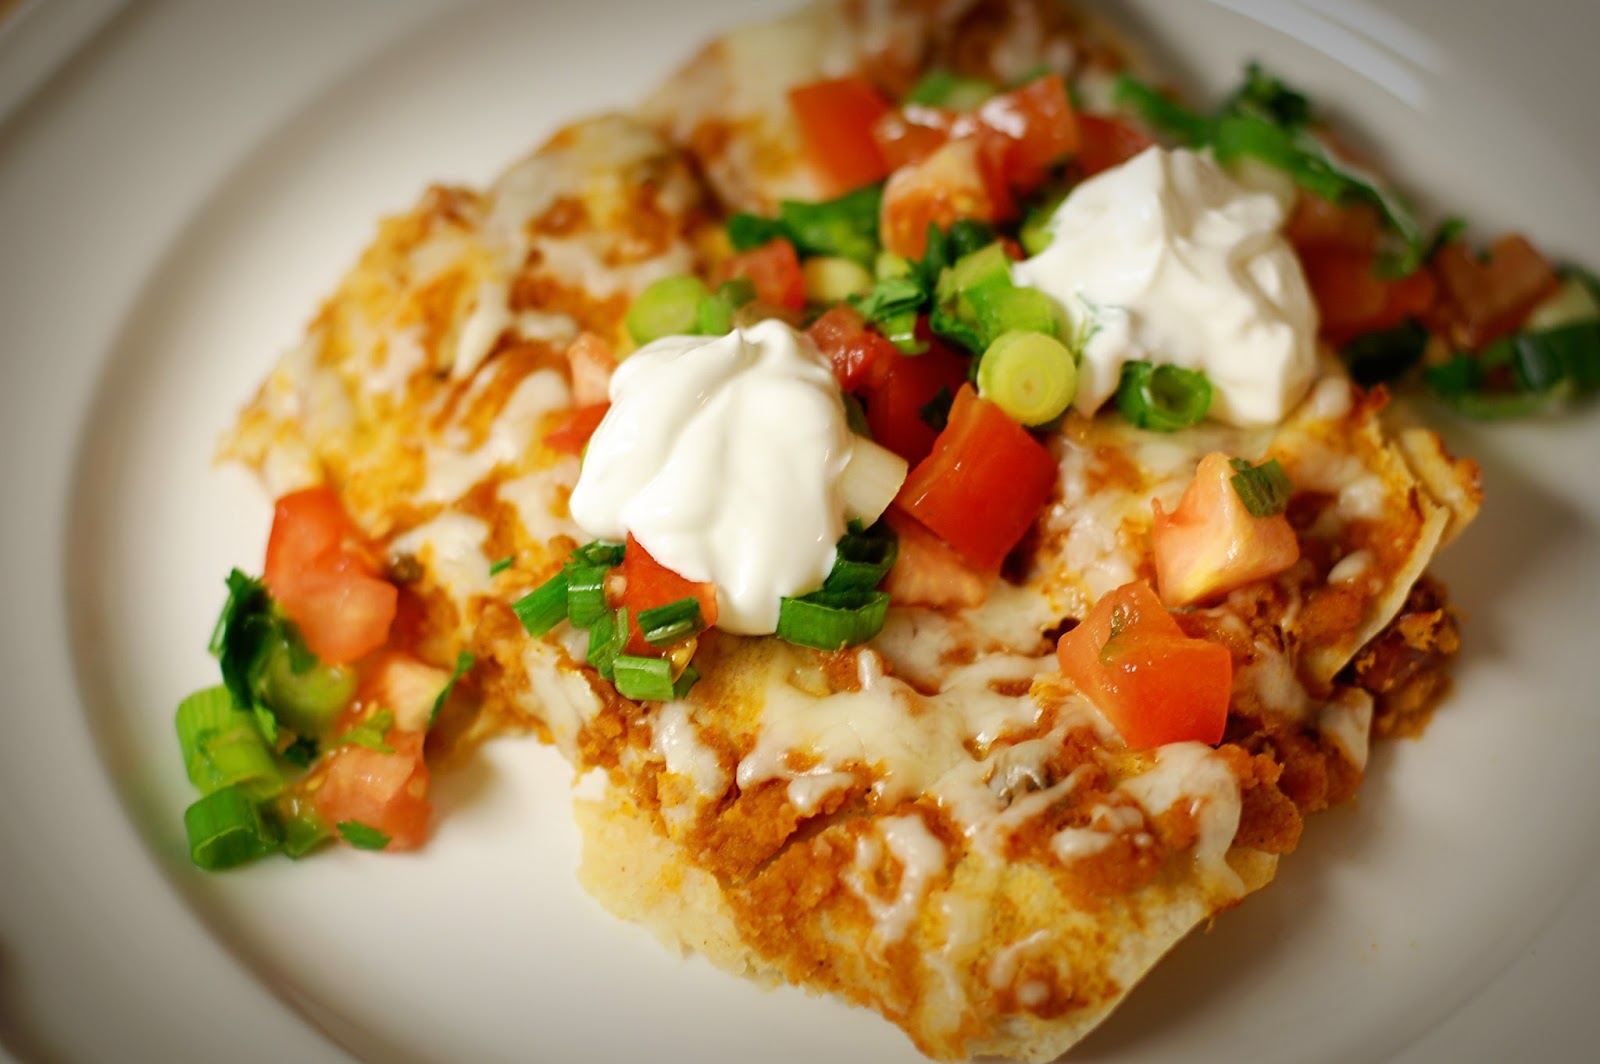
Pumpkin, Bean, and Chicken Enchiladas
Adapted from Ladies' Home Journal Family Favorites Volume 6
Makes 4 servings Print-friendly version
2 tsp. olive oil
1/2 c. chopped onion (1 medium onion)
1 fresh jalapeno, seeded and finely chopped (optional - I left this out and added more chili powder)
1 15-oz. can pumpkin
1 1/2 to 1 3/4 c. water
1 tsp. chili powder (use more if not using jalapeno)
1 tsp. ground cumin
1/2 tsp. salt (may need to taste and add more)
1 c. red kidney beans, drained
1 1/2 c. chopped or shredded cooked chicken breast
1 c. shredded part-skim mozzarella cheese
8 6-in white corn tortillas, softened
Pico de gallo or salsa (optional)
Preheat oven to 400 degrees. Spray a 9x13 baking dish with nonstick cooking spray; set aside. In a medium saucepan, heat olive oil on medium high heat. Add onion and jalapeno, if using; saute' until tender, about 5 minutes.
Stir in pumpkin and add 1 1/2 c. of water. Cook and stir in chili powder, cumin, and salt. If needed, add more water to reach desired consistency.
Soften tortillas in the microwave between paper towels - or heat them individually in a nonstick pan. My tortillas were already soft and extremely pliable, which made them become too soft when the enchiladas were cooked, so I found it necessary to heat them a pan to crisp them up slightly.
In a large bowl, slightly mash the beans. Stir in half of the pumpkin mixture, the cooked chicken, and 1/2 c. of the cheese. Spoon a generous 1/3 c. of the bean mixture onto each tortilla. Roll them up and place them seam side down in the prepared dish. Pour the remaining pumpkin mixture over the tortilla roll-ups.
Bake, uncovered, for 15 minutes. Sprinkle with remaining 1/2 c. cheese. Bake 10 more minutes, making sure that cheese is melted. If desired, serve with pico de gallo. (A quick pico de gallo is made with equal parts chopped tomatoes and onions - I used green onions for this recipe. Add jalapeno, or not - I didn't this time. Throw in some chopped cilantro and sprinkle with salt and lime juice. Easy and flavorful!)
I haven't blogged in sooo long, but I just had to put this very excellent recipe out into the universe on this day before Thanksgiving. Those of you who are last-minute internet recipe gatherers need look no further. ;) But truly, it's a great Christmas recipe, too. Great for gifts, great for freezing! Honestly, it's super easy, just like a traditional pecan pie...except there's something better here. It's prettied up by the addition of fresh cranberries, becoming ever-so-festive - and the tartness is perfect. Because isn't regular pecan pie a little too sweet anyway? This adaptation just *works.*
I've made this pie many, many times over the last few years (I've even sold some) - and given out the recipe many, many times, too. Make it. You're gonna love it.
P.S. I always make a homemade pie crust, except for this one time last week when I was a little under the weather and decided to buy a pre-made one, as evidenced by the pictures in this post. But, seriously, my pie crust recipe is super easy and totally worth about 15 extra minutes of time to make it. I'm sharing it below, too.
3 eggs
1 c. corn syrup
2/3 c. granulated sugar
1/4 c. butter, melted and cooled
1 tsp. vanilla extract
2 c. fresh (or frozen) cranberries
1 c. halved (or chopped) pecans
pinch of salt
deep-dish unbaked pie crust (recipe below)
Preheat the oven to 425 degrees F. Melt the butter and set aside to cool. Wash the cranberries and pat them dry. In a large bowl, combine the eggs, corn syrup, sugar, and vanilla - add the melted butter. Stir in the cranberries and pecans and pour into an unbaked pie crust. Bake at 425 F for 10 minutes. Reduce heat to 350 degrees; bake 30-40 minutes longer or until filling is *almost* set. Cool completely on a wire rack. Cover and refrigerate for several hours or overnight before slicing.
Easy Oil Pastry
Adapted from Betty Crocker's Cookbook
Makes one deep-dish pie crust Print-friendly version
2 2/3 c. all-purpose flour*
1 1/2 tsp. salt
3/4 c. canola oil
4-5 Tbsp. cold water
Measure flour and salt into a medium bowl. Add oil and mix until particles are the size of small peas. Sprinkle in the cold water one tablespoon at a time, mixing until flour is moistened and dough almost cleans the side of the bowl. Press dough into a ball.
I don't roll out this dough - I just press it into the pie plate. (If you're using this dough for a different recipe that calls for a baked pie crust, just prick the crust all over with a fork and bake it at 475 degrees F for 12-15 minutes.) For this cranberry pecan pie, though, just press (or roll out, if you prefer) the dough, then pour the filling into it, and continue following the baking instructions above.
*From years of testing, I have decided that I prefer to use a mixture of White Lily flour and King Arthur flour (about half and half). I adore the lightness and taste of White Lily (it's my favorite flour) but the crust will be extremely crumbly. King Arthur gives it some needed togetherness. If this conversation seems somewhat fussy to you, I give you full permission to use whatever all-purpose flour you desire. ;)
Ahem! Attention please. I've decided to magically create three more weeks before Christmas Day. I mean, I'm totally ready to see my family and (magically) I actually have all of my shopping done. But I've done a total of ONE Christmas Cheer post so far and I had BIG plans of blogging really often during December. There is just not enough time between Thanksgiving and Christmas. There's just NOT. (Hence the argument for blending holidays.) Even though I've listened to Christmas music since August and made ornament wreaths for the last six months, I should have heeded my own advice and decorated my tree two weeks before Thanksgiving. I didn't fully get the tree and mantel exactly how I wanted them until, oh, last week. (But now I do really, really love them.) And I finally made a mailbox topper, well, yesterday. And somehow during all this rain, I'm totally going to put up wreaths on our front windows because they make me happy. And they will keep on making me happy until at least mid-January. Unless I can come up with a Harry Potter spell to give me some time. Wait, I need Hermione's Time Turner...! Who's with me??
If you're also running short on time and need an easy, quick recipe that still promises marvelous results, I can definitely help you out today. (Because why would you want to spend any amount of time making something that's not marvelous?) I've made four recipes of this in the past two weeks. Two for a catering event, one for a birthday party, and one for Christmas presents. And it was marvelous every time. You don't even have to use a candy thermometer. Bonus.
It's just slightly adapted from a recipe my mother used to make often when I was little. She called them Butter Pecan Turtle Cookies, but somehow, I felt like changing the name. They're chewy and crunchy at the same time, with a layer of toffee that is so super good. Mmmm!
Crust layer:
2 c. all-purpose flour
1 c. firmly packed dark brown sugar
1/2 c. butter, softened (*I recommend using an unsalted butter and adding a flaky sea salt between the toffee and chocolate layers)
1 c. whole pecan halves
Toffee layer:
2/3 c. butter (*see note above)
1/2 c. firmly packed dark brown sugar
flaky sea salt, to taste
Chocolate layer:
1 c. milk chocolate chips (or use half milk chocolate and half dark or semi-sweet)
Preheat oven to 350 degrees. Combine the crust ingredients with an electric mixer until particles are fine. Pat firmly into a lightly greased 9x13 pan. Arrange pecans evenly, top side up, onto the crust, pressing them into it slightly. Set aside.
To prepare the toffee layer, combine butter and brown sugar in a heavy, medium-sized saucepan. (I recommend a non-stick pan.) Cook over medium heat, stirring constantly until entire surface begins to boil. (The mixture will start looking light - almost "fluffy.") Boil the mixture about 30-40 seconds, still stirring constantly. Immediately remove from heat and pour the hot toffee over the pecans and crust. You may need to turn the pan a few times to coat the edges of the crust. Place the pan in the oven for about 10-20 minutes, watching for the entire surface to become bubbly and the crust to become light golden brown. (My oven takes about 15-16 minutes.)
Remove from the oven, sprinkle evenly with sea salt, and immediately follow with the chocolate chips. (I won't tell if you decide to use a little more than one cup.) After a minute or so, they will have melted - slightly swirl the chocolate for a pretty finish. Cool on the counter for about 30 minutes and then in the fridge for about an hour. I recommend storing these at room temperature after letting them set up in the refrigerator. They can be *very* difficult to cut otherwise!
P.S. I would imagine that these would be perfectly fine with salted butter and no addition of sea salt. I just had a TON of unsalted butter that I got on a recent sale - so, of course, I used that.
This is what happens when your camera needs an extreme closeup.
You catch a whiff of chocolate and start thinking,
"Um, yeah, that'd make a cute picture with a bite out of it..."
Not very long ago, I wasn't so sure I liked radishes. Luckily, my friend Bridget surprised the tea party committee with this intriguing tea sandwich recipe and everything I thought I knew about radishes vanished into thin air. Every one of us loved the slightly spicy taste of these and the general prettiness of the radish rounds decorating the top. It was a perfect addition to our tea menu this year!
Radish-Chive Tea Sandwiches with Sesame and Ginger
Mix butter, 2 tablespoons chives, sesame seeds, ginger, and oil in small bowl; season with salt and pepper. Spread butter mixture over each bread slice. Trim bread into desired sandwich shape, such as squares or rounds. Top with radishes, overlapping slightly. Sprinkle with remaining chives. Serve sandwiches open-faced.
It's almost time. The white tents are being delivered today. The sun is shining and the skies are blue and they are promising to still be so pretty three days from now. What a relief! Since I have multiple lists whose items I'm feverishly crossing off, I wanted to share something with you that I wrote last year. Not something from my blog coverage of the tea party. Something a little more formal that was actually printed in our local newspaper. Hope you enjoy...and hope you get excited for this Saturday! Even if you're not able to attend because maybe you live in Canada or Massachusetts or China (hello to my readers from those very places!) - please have a spot of tea and maybe some rosemary parmesan hearts (recipe below) this weekend and think of me...
Amidst thunderstorms and threats of area flooding, the eighth annual Freed-Hardeman University Associates’ Victorian Tea Party still saw success this past Saturday, May 1st. The usual location of the Hardeman House had to be changed for the very first time to the Henderson church of Christ building, which is just across the street. Loyal guests were prepared for the change of venue. As previous guest and out-of-towner Katherine Bennett sent word, “My girls and I are coming, rain or shine!”
With tea tables set up in the lovely Commons area, the first group of guests arrived at the scene right as the electricity went out. Susan Edmonds commented afterwards that, “Everything seemed to go smoothly and the no-power thing just seemed to transport us back to Victorian times.” Luckily, enough hot tea had just been brewed to last the guests until the electricity returned halfway through the tea party.
Guests were served tea party fare on three-tiered plate stands entwined with floral greenery and each topped with a small pastel butterfly. The food served at the 2010 Victorian Tea Party included Savory Cucumber Sandwiches, Spicy Cheddar Pimento Sandwiches, White Chocolate Cherry Scones with Chocolate Cream and Cherry Butter, Chocolate Raspberry Tassies, Mini Spongecakes with Jasmine Tea Buttercream, Rosemary Parmesan Hearts, and Lemon Turnovers, which were accented with fresh strawberries and grapes.
The two teas chosen for this year were Madame Butterfly Jasmine, which is “simply the best green tea with a heavenly jasmine fragrance,” according to Debbie McLaughlin, co-chair of this year’s tea party. The steering committee’s overwhelming response to this tea inspired the serendipitous butterfly theme for this year’s tea party. McLaughlin describes the second tea, Norfolk Blend, as a “robust black tea blend perfect for a morning wake-up call or a lovely afternoon tea party.” A refreshing lemonade was also served.
The smallest guests were still able to giddily enjoy dressing up in princess costumes, provided by Becky Welch. Ashley Hardin made sure that the little ladies had an appropriate place to have their picture taken by setting up a small wicker table and chairs and hanging a fanciful canopy above it. Beribboned butterfly wands, prepared by Rhonda Thompson, and paper doll design were also popular areas for the little girls.
“We are making precious memories,” noted Dwina Willis, who always attends the tea party with her daughter, Becky, and granddaughter, Laura Beth. These precious memories were recorded this year by FHU’s Jud Davis, who will soon be uploading the portrait and candid pictures to http://photos.fhu.edu for purchase.
The adult guests appreciated learning a new needlework at Laurel Sewell and Sasha Gott’s candlewicking venue, which is a form of white-on-white embroidery. Committee member Karen Walker had been the mastermind behind this venue but could not attend the tea party due to recent back surgery. Another beautiful venue was set up by Margaret Payne and featured various tea accoutrements for the purpose of showing guests the proper way to prepare and serve hot tea. Also at this venue was an ingenious lamp constructed of a teapot topped with teacups and saucers, a show of the appreciation of tea culture. Adapted from Country Living magazine, Laurel Sewell’s creation inspired others to make their own at home; her instructions were included in the souvenir program.
Guests browsed the offerings of the Tea Boutique and many took home colorful teapots, handmade fabric tea cozies, dainty teapot bead jewelry, packaged food items, and various other tea accoutrements to continue their own tea party at home. One guest reported later that, after a tornado siren woke her up early Sunday morning, she was not able to go back to sleep. Instead, she enjoyed reliving the events of that day’s tea party, complete with some of the delicious rosemary parmesan hearts, in the middle of the night.
Besides a change in venue, this year held another first in that a Silent Auction was set up to offer the ladies the chance to bid on an excellent gift basket, thanks to Valeria Pitoni. The gift basket contained various handmade products from Stillwaters Farm and a gift certificate for a one-night stay at The Cottage at Stillwaters Farm, located here in Chester County.
“This day would not have been possible without the help of many, many people,” says Kristen Hicks, co-chair of this year’s tea party. “We had a great steering committee, lots of volunteers donating ingredients and making all of the wonderful food at ‘cooking parties’ leading up to the day of the tea party. There were so many hard-working Associates moving tables and chairs, washing dishes, decorating, and cleaning up. Husbands and fathers were involved and we appreciate them so very much, too. We had some volunteer students from FHU also who helped set up, serve, and clean up. I can’t even imagine having this event without all of these volunteers. We just couldn’t do it.”
Sponsors for this event were Chester County Bank, Dr. Larry Bloomingburg, FHU Bible Bookstore/University Store, Mary Kay (Susan Edmonds), The Peoples Bank, Lookin’ Good/A-1 Realty, Hester Publications, No Xcuse Fitness, Stillwaters Farm, Bramblett Group, Shackelford Funeral Directors (Casey Chapel), Happy Kids Consignment Shoppe, Radio Shack, and Patricia Jones, Republican Nominee for Chester County Mayor.
Hicks added, “Our corporate sponsors and individual patrons are an integral part of our success every year, too. All of our profits go toward FHU student scholarships and we are blessed that so many people have the same vision as we do.”
¾ c. Parmesan cheese, finely grated (not powdered)
2 egg yolks
Preheat the oven to 350 degrees F. Mix the flour and baking powder together and cut in the butter until the mixture resembles bread crumbs. Add the Parmesan, rosemary, and egg yolks. Continue working the dough until it forms a ball. This can all be done in a food processor.
Roll out the dough on a lightly floured surface to 1/8” thick and cut out with a small heart cookie cutter. Re-roll the remaining dough and continue cutting out hearts until the dough has all been used. Place the hearts onto baking stones, if possible, or baking sheets lined with parchment paper. Bake approximately 10 minutes or until golden. Cool on wire rack and store in airtight container.
It's exactly what you think it is. I did it. And I'm not ashamed. I just hope you won't judge me too harshly. Because, well, I toasted those cute little yellow Peeps.
And it was AWESOME. I'm not even kidding...they were the *BEST* s'mores I've ever tasted. And I'm a s'mores connoisseur. I think it was because the sugar coating caramelized...much like the topping of a Creme Brulee. It was an entirely pleasant surprise. (By the way, I made a Creme Brulee cheesecake for my cousin's birthday party last night, lest you think I'm getting too redneck for this blog. Plus, I just used the word "lest.")
Yes, that is peanut butter you see smeared on top of the graham cracker. Which is my mother's totally fantabulous addition to The S'more. And since we don't have Hershey bars lying around the house at any given time, we usually use chocolate chips. What you see here is a mixture of milk chocolate, semi-sweet, and white chocolate chips. (The butterscotch ones are also a crowd pleaser.)
What a quick dessert! And now you won't have a zillion cupcakes lying around, being all left-over and begging to be eaten tomorrow. Word to the wise.
And maybe the Peeps will be the only ones who need to apply a little cocoa butter for those embarrassing stretch marks. Here's hoping.
If you need this recipe written out, word for word, and a printable link created, you just let me know. ;) In the meantime, you might want to stock up on some Peeps. At half price.
Hope you had a Happy Easter! Alright, back to tea party planning...and praying for no tornadoes this time. You can pray, too. I'd really appreciate it. ;)
This morning I posted an entry on The Art of Hospitality over on the PrettySweet: Heaven-Minded blog. I am now posting this recipe to go along with it, because truly - it's a great breakfast recipe for overnight guests. Bacon, eggs, oatmeal chocolate chip cookie muffins, and maybe fruit? Coffee or tea? It's the way to go.
These muffins have a great texture from the oatmeal - and a great crunch from the sprinkle of turbinado sugar on the top. Don't leave this step out. I almost forgot until I took one more look at the recipe...and then pulled the muffins right back out of the oven and added the topping. It's a fairly healthy muffin recipe, too. Fairly. ;)
Just don't make fun of how much milk that my coffee requires...Got it?
These muffins are best right out of the oven, but they really are still good for the next few days. If you reheat them, say, in the microwave, feel free to add another little sprinkle of the turbinado sugar to pull the crunch back into play. Those sugar crystals tend to dissolve overnight...
1 c. whole wheat pastry flour (or all-purpose flour)
1 tsp. baking soda
1/4 tsp salt
1/2 tsp. ground cinnamon
1 c. chocolate chips (I used half milk and half semi-sweet)
sprinkle of raw turbinado sugar
Preheat your oven to 350 degrees. Add the oats to a bowl and cover with 1 cup of milk. Let the oats soak for 5 or 10 minutes while you prepare the other ingredients.
Whisk the egg and the brown sugar together in a large bowl until smooth. Add vanilla and melted butter, whisking again until smooth. In another bowl, mix the dry ingredients: flour, baking soda, salt, and cinnamon. Add both dry mixture and the oat mixture to the egg mixture. Fold in the chocolate chips.
Line your muffin tin with paper liners. Evenly distribute muffin batter into the twelve cups. Sprinkle the tops of each muffin with raw turbinado sugar. Bake the muffins for 15-18 or until brown and cooked through. Serve with a pat of butter on the top, if desired.
First of all, let me ask...why are chocolate covered strawberries only a Valentine's thing? They are so pretty and so fun and so delicious that I think I shall start making them year round. Or at least the whole month of February, while they are still on my mind. And again in the summer, when strawberries are truly in season. Oh, yeah.
Yes, you can pay someone to make them, which I have done before (and they WERE awesome) but they're expensive. Sigh! So sometimes I say to myself, "Self, you can make this. And self, you can save some money." And that's what happens. (Side note: my husband loves when I make these kind of comments to myself.)
This year I found some Baker's Dipping Chocolate in little microwaveable containers. Brilliant! I bought both semi-sweet and milk chocolate containers and it was beyond easy. Just follow the directions on the container. Then, since I have a little stash of sprinkles, I prettied them up even more than mere chocolate can do. (Though mere chocolate is enough. For the rest of the year.)
Refrigerate for a few minutes. Serve. In the words of Ina Garten, "How easy is that?"
Up next...Part II: Flowers, Part III: Dinner, and Part IV: Gifts
P.S. One more picture...this is what happens when non-professionals try their hand at the drizzling thing...
Generally, I'm not much for puddings. I mean, I have some recipes for trifles and whatnots that call for instant pudding - and I oblige...it's just so quick and easy! But in my eyes, pudding is never the star of the dessert. The brownies or strawberries or sweetened whipped cream factor is always the star. Pudding is creamy and it's nice that it's there, but in 97% of situations, if there were a bowl of vanilla pudding sitting in the fridge, I could resist it, no problem. (The other 3% would involve NO chocolate OF ANY KIND being available in the house. And you will notice that 3% is a very, very tiny percentage. Our house always has chocolate.)
That's why the recipe I'm about to share with you is a game-changer. I am sitting here at the computer, composing this post, la la la - but I'd really much rather standing at our refrigerator door, sneaking a few spoonfuls of Smitten Kitchen's vanilla bean pudding. Oh, dear, yes.
I've made only a few custards in my day, but each time I have to psych myself up to do it. There's no telling what could go wrong - there's been limited success - and sometimes I've had to remake them. Which stinks. I just don't feel competent in that area. I know, I know...practice makes perfect. Well, all I know is that I'll be saving this vanilla bean pudding recipe and substituting it in every other situation that calls for pudding or custard or such. Banana pudding? Yes. Peanut Butter Pie (that they don't make any more...sad!) from The Olde Pink House in Savannah? Definitely. And can you freeze your own pudding cups? Because, man! That is seeming like an excellent idea!
If you get right down to it, though...this pudding needs nothing else. It can stand alone, exactly as is. I felt true bliss while we ate some last night. Still warm because we couldn't wait until ten o'clock at night at eat dessert. It was very delicious already - and Jeremy actually heated his back up in the microwave when its temperature dropped. (He was eating it and studying for a presentation for work at the same time). "It got cold!" he said.
All of this is truly amazing to me. Because you know how I feel about pudding. Yes, yes, I know it's because there's such a difference between instant and the real stuff, but it's still amazing.
So, I need to tell you that Smitten Kitchen is the cat's meow. The proof is in the pudding. (How do you spell that drum/cymbal crash after a bad joke?) Anyway, Deb is the Big Time, cooking from her tiny kitchen in NYC, and is now working on a Smitten Kitchen Cookbook. (Yea!) I'm terribly excited about that because I adore her writing and I think she's super smart in the kitchen. As evidenced by several testings/tastings of her recipes that I myself have held in my own kitchen. If you meander on over to her site, be sure to also click on any links embedded in her text - she's got the cutest little curly-headed toddler that shows up at least once in every post. =)
Back to foodstuffs...if you're trying to decide whether you can master the following recipe or not, remember that a pudding novice had great success with it, so I feel sure that you, too, can make this happen in your kitchen. I do have a few notes, though...
First of all, you may already have guessed this by reading the very name of the recipe, but it does call for a vanilla bean, which is exactly what inspired me to make it - because I already had some. BUT. If you don't, you may still use vanilla extract, but please use the good stuff. (A side, side note: vanilla is quite expensive in all of its variations, but do you know why? I did a little research while I was purchasing them awhile back and was very interested to see how fussy a vanilla bean vine is to grow and harvest. One has to hand-pollinate each flower! If I were growing them, I'd be charging quite a bit, too. Fortunately, a little goes a long way. That being said, I did use one whole vanilla bean instead of the half that Deb called for. Don't skimp - it's scrumptious!)
Also. Milk. Deb's recipe calls for whole milk, which I don't ever have. What I do have on a regular basis is a fridge door full of skim milk (for drinking) and half & half (for coffee/tea) - and often, heavy cream (for making scones/desserts), which was the case last night, as I had recently made scones. I used a mixture of all of these, to good effect. I would not have attempted this with only skim milk. Word to the wise.
Now, let's get started. While it's good to have your ingredients and measuring apparatuses lined up before beginning any recipe, I encourage a somewhat heightened kind of preparation in this recipe - along with studying it for just a few minutes before putting the milk on to start heating. Don't freak out...it's really not difficult, but for pudding novices, it's just going to be easier (and more fun) to be ready than to not-be-ready.
Seeds (caviar as it's called) from one vanilla bean - or two teaspoons vanilla extract
1 large egg
1 Tbsp. unsalted butter (optional)
Begin heating 2 cups of the milk in a medium saucepan over medium low heat, stirring frequently. Combine sugar, cornstarch, salt, and vanilla bean seeds in a separate heat-safe bowl. (Hint: I used my KitchenAid with the whisk attachment for this step.) Toss the empty vanilla bean pod in the saucepan to steep as the milk continues to heat.
Slowly add the remaining 2/3 cup of milk to the sugar mixture, whisking well during the process. Also add the egg and whisk again to combine.
Bump up the heat a tad and stir until the milk in the saucepan just begins to boil. Retrieve and discard the vanilla bean pod. Slowly pour just a tad of the hot milk into the sugar/cornstarch mixture, whisking constantly. (Important: this will temper the egg so that you won't end up with scrambled eggs. It can happen.) Slowly add the rest of the heated milk and continue whisking until things are thoroughly combined.
Pour entire mixture back into saucepan, making sure all of the sugar and vanilla bean seeds go with it (some may tend to hang out on the bottom of the mixing bowl) and heat again on medium low. Stir constantly with a silicone spatula with a wide, flat edge (my choice) or a wooden spoon. As it heats, you will notice that the spatula or spoon will start gathering thickened pudding from the bottom of the saucepan. Proceed to stir somewhat quickly as it cooks about one minute longer and thickens up considerably - but don't worry about any lumps that begin to appear. You can whisk those out. After doing so, stir in the tablespoon of butter if you choose to. I chose to - and it was outstanding.
Pour one-half cup of the pudding into six small ramekins. (I think I got my heart-shaped ones in the dollar aisle at Target a few years ago.) To avoid pudding skin, press plastic wrap gently onto the surface of the pudding before chilling in the refrigerator. Chill at least two hours. Or eat it warm, like we did, if you just can't wait.
One of my future projects is to organize my recipes - besides my cookbooks and online food blogs and ideas floating around in my head, there's this (pitiful) stack of recipes that Jeremy and I have. Newspaper clippings, printings from allrecipes.com, handwritten ones on scraps of paper and napkins. I do have an accordion file where my most favorite (usually handwritten) ones reside, but they're still difficult to find and I refuse to keep filing the newer ones away using such an unfortunate system. Sigh! The trials of perfectionism. Too many times it holds a finished product at arm's length. If anyone can help me, it would be much obliged.
I've never even tried quite a few of these stragglers. I remember one time that I made a completely terrible, sodium-laden beef and broccoli stir-fry using one of these random recipes - and with great relief, I just threw the recipe away afterwards. Jeremy cheered me on. The recipe had no redeeming qualities...nothing that made me say, "Almost! I'll keep tweaking."
After church this past Sunday, though, I tested out a recipe for Cincinnati Chili that was plucked from this unsightly stack of recipes. It will surely go into the special saved file, whenever I figure out my system. It was really very good - and different from any chili we've ever had, due to the combination of spices. Sure it had chili powder, but what intrigued me was the unsweetened cocoa, the allspice, the cinnamon. Right down my alley, I tell you. And chili served on top of pasta?? Unheard of! We had to check it out.
Now, I don't know all that much about Cincinnati chili in general - I'd heard the name of it before, but that's about it. And this recipe was submitted to the publication from someone who lives in Massachusetts. Figures. Unless there's a Cincinnati in Massachusetts...hmmm....
Dana, my Ohio reader, you'll have to let me know if this recipe is legit. ;)
1 lb. lean ground beef
3/4 c. diced red (purple) onion
1-2 garlic cloves, pressed
1-2 cans (15 oz. each) tomato sauce
1 1/2 c. water
2 tsp. unsweetened cocoa
1 1/2 tsp. chili powder
salt, to taste (depending on sodium content of tomato sauce)
1/4 tsp. ground allspice (or a little ground ginger, nutmeg, and cloves)
1/4 tsp. ground cinnamon
1/4 tsp. ground cumin
1/8 tsp. ground cayenne pepper, or to taste
1 1/2 tsp. apple cider vinegar
dry pasta, cooked according to package directions (our favorite is angel hair)
1 (15-oz.) can red kidney beans, heated
chopped onion, for garnishing
shredded cheddar cheese, for garnishing
Crumble beef into a large, non-stick skillet, cooking over medium-high heat. Brown beef and add diced onion halfway through. Mix in pressed garlic, tomato sauce (starting with one can), water, cocoa, chili powder, salt, allspice, cinnamon, cumin, cayenne pepper, and vinegar. Bring to a simmer, stirring often. Taste the balance of spices - I felt it was too tame so I added more. Then it got a tad too spicy - never fear, though! Just add more tomato sauce - I added another half can of it because it seemed the sauce was too thin also.
Simmer with skillet uncovered for about 1 hour. To serve, ladle sauce over cooked pasta. To finish it off, add kidney beans, more onion, and cheese. Or just add the kidney beans to the meat mixture. I'm not sure why it's a "topping." Either way, enjoy!
Moist poppyseed bread, along with a side of sausage balls, will always remind me of Christmas morning breakfast. For years my mother has made this recipe given to us by our friend Rosemary and we think it is exceptional. If you need a Christmas breakfast idea that you can prepare ahead of time - or a last-minute gift for some friends, this is the way to go!
This time I didn't have quite enough poppyseeds, but since they don't provide a taste of their own, really, it all turned just fine. =)
3 eggs 2 ½ c. sugar 1 ½ c. milk (I did half skim milk; half heavy cream) 1 ¼ c. canola oil 1 Tbsp. poppyseeds 1 ½ tsp. baking powder 1 ½ tsp. salt 1 ½ tsp. vanilla (or vanilla bean paste) 1 ½ tsp. almond flavoring 3 c. all-purpose flour Glaze: ¾ c. sugar ¼ c. orange juice ½ tsp. vanilla (or vanilla bean paste) ½ tsp. almond flavoring 2 Tbsp. butter Cream eggs and sugar. Add milk and remaining ingredients for bread. The batter will be somewhat thin. Grease and flour loaf pans. Bake at 325 degrees for about 1 hour 10 minutes for 2 large loaves; 50 minutes for 4 medium loaves; or 35 minutes for 6 small loaves. Watch closely, though – don’t let the outside edges get too brown. Administer the toothpick test to check doneness. Better to err on the side of "almost done." Glaze: Bring to a boil, stirring constantly. Make LOTS of holes with toothpick while bread is still warm. You want to give the glaze plenty of places to seep in. Pour warm glaze over warm bread. Cool completely before storing.
P.S. Before I go, I have a few more songs to make your Christmas merry! I just love Mindy Smith's Christmas album, but these are probably my three favorites. I'm pretty sure that all three are original to her - and I'm crossing my fingers that she releases another Christmas album sometime. She's just GOOD at it.
When I first happened upon this recipe, I was alternately afraid of the bizarre-sounding coupling and also very intrigued. Curiosity won out, though, as I really couldn't get the recipe out of my mind. And, as luck would have it, I had recently popped a pomegranate into my grocery basket in hopes of finding just the right way to use it.
Jeremy was very, very concerned about the inclusion of pomegranate seeds (called "arils" - and I like that so much better, don't you?) INTO a COOKIE. He knew for a fact that I was about to ruin that chocolately cookie dough by adding in something so...strange. But I knew for a fact (or O.K., I very, very strongly suspected) that this would be one of those recipes that would make a believer out of him.
And it DID. Our friends Jen, Sasha, and Jared all loved them, too. The little pop of tartness every so often kept us entertained. It will make a believer out of you, too. But you've gotta get past your fear of the unknown...
First of all, don't be scared of pomegranates. Yes, they can be messy and yes, it might take a while to release the arils from their pithy prison...BUT. Here's an easy (and less messy!) way to do it. After washing the fruit, slice off the pomegranate's "crown." (I'm not going to lie - I got some satisfaction out of noting that it does, indeed, resemble a crown.) Next you realize that you might need to put an apron on and move some things out of the way that might get splashed with the ruby red spurts of juice. Gently cut the fruit into quarters and then drop them into a bowl of water. I would recommend lukewarm water so that your fingers won't get too cold during the next step. Again, gently (which is the key word here) start separating the arils from the inside casing. This will take a few minutes, but really, is quite relaxing if you're not in a hurry. This is also a good time to ponder God's creativity in designing such an interesting fruit. =)
Now it's time for the actual cookie recipe. I found it on How Sweet It Is, another favorite food blog that I completely enjoy. She absolutely cracks me up. Hilarious! And I've tried quite a few of her recipes, all ending up being filed under "Would Definitely Make Again."
1 c. butter, room temperature
1 1/2 c. sugar
2 eggs
1 tsp. vanilla
2 c. all-purpose flour
1/2 c. cocoa powder
1 tsp. baking soda
1/4 tsp. salt
2 Tbsp. pomegranate juice (or pomegranate/blueberry juice, which was all I could find. Delicious, but EXPENSIVE)
1 c. milk chocolate chips
1/2 c. pomegranate arils
Cream butter, sugar, eggs, and vanilla until fluffy. Sift flour, cocoa powder, baking soda, and salt - combine dry mixture and wet mixture. Add pomegranate juice and mix once more. Fold in chocolate chips; fold in pomegranate arils last. Refrigerate dough for at least 2 hours - but the longer, the better.
When dough is ready to be baked, gently scoop dough out and onto a greased or parchment-lined cookie sheet. Some arils will burst in the process, but it all ends up O.K. =) Bake cookies at 350 degrees for 8-10 minutes. Cool a bit before eating.
These cookies are best eaten right after baking. After about a day, the pomegranate arils start to shrink and aren't juicy anymore.
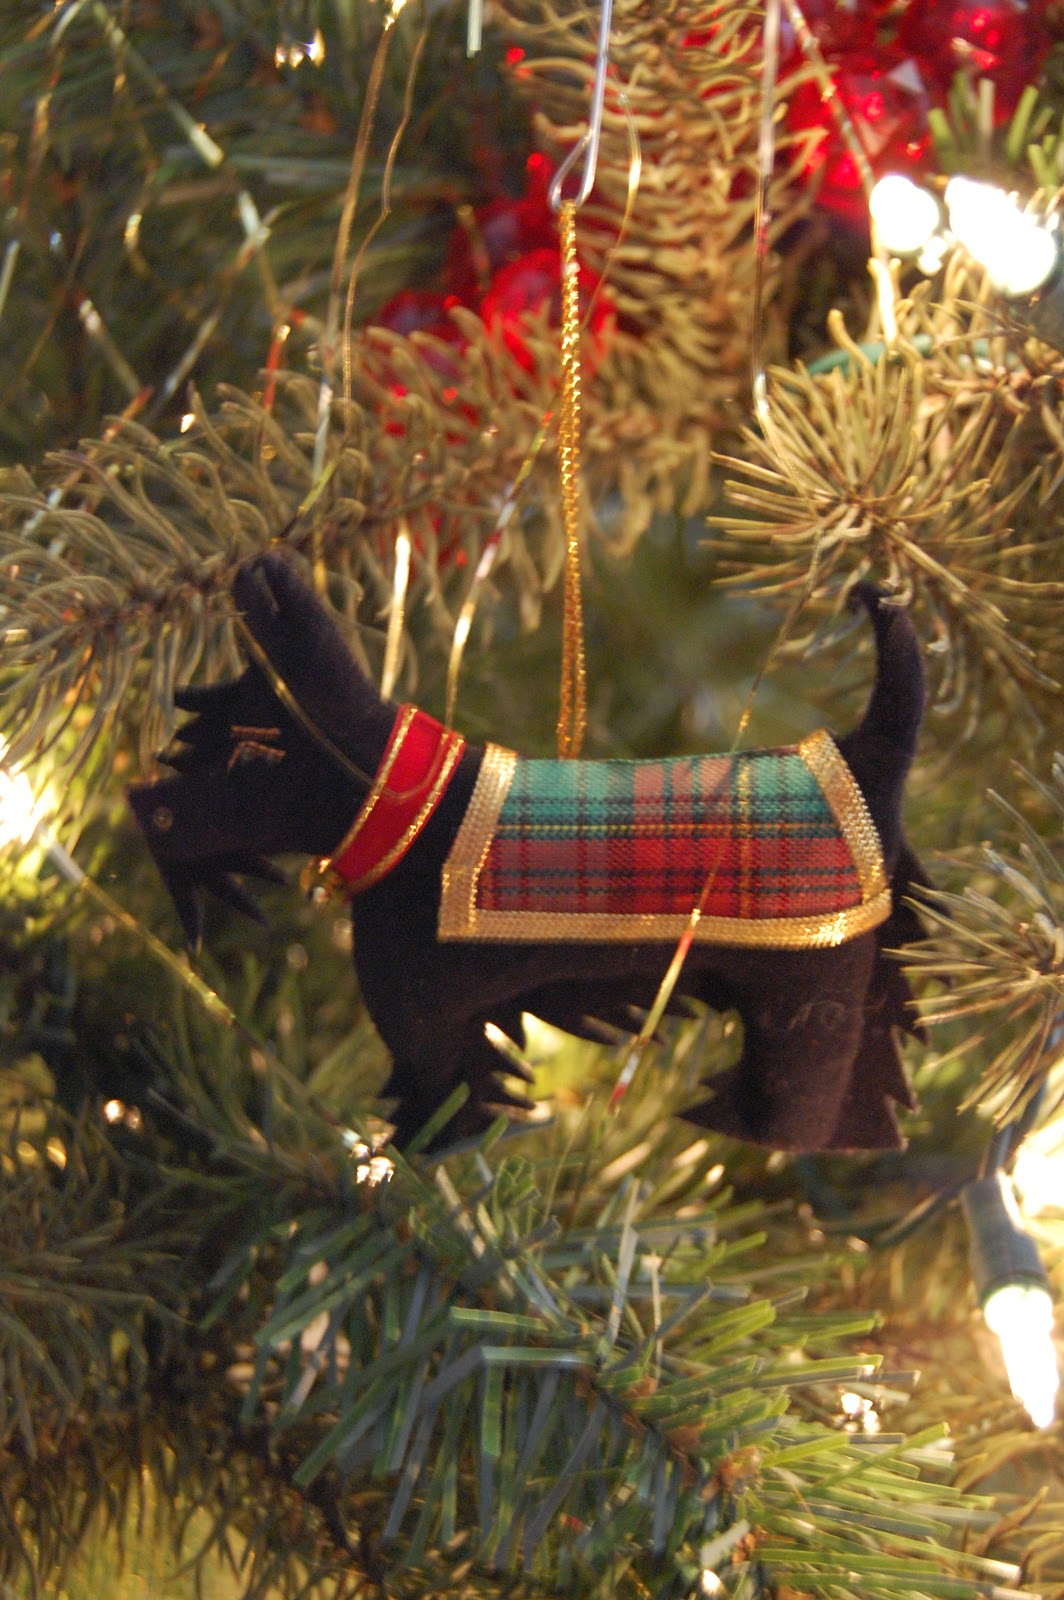
This Christmas tree makes me giddy. I think it's beautiful, but not just because of the colors or the sparkles, though those are enough to induce giddiness themselves. The memories that each ornament sparks make trimming our tree an entirely pleasant occasion.
But first...the tree itself. Growing up, my parents always, always bought a live tree, a Fraser fir, every December. The shape was attractive and the scent was heavenly. But my mother likes an enormous amount of little lights on her tree...I mean, each branch was wrapped. Each. Branch. Was. Wrapped. It took a looong time and luckily, I was always excused because she thought it might "get my allergies going." I am still thankful for that! But all I wanted was to get in there and put the ornaments on and what in the world was taking so long???
Somewhere along the way, when I was almost grown, she finally gave in to the siren call of the pre-lit tree...and has never looked back. And although I always said that I would have live trees when I had my own house, well, a trip to Target four-ish years ago changed all that. Due to a mislabeling incident, I lucked out with paying only $50.00 for the tree. This big, tall, realistic-looking tree! That would have been at least $300.00! I couldn't believe it. So, obviously, it was meant to go home with me and be my tree. It did and we have been very happy together. We're even happier because I get to burn my Yankee Candle What's My Pine soy candle (purchased much cheaper at TJMaxx) to get that delightful fresh-tree scent.
The ornaments that are pulled out, carefully unwrapped, and placed on this tree are the next layer of sweetness. My mother had the great foresight to start my collection of ornaments from each of our travels through the years. I am highly trained in this endeavor and I am very picky. There will be no vague ornaments, such as a pair of flip flips sporting a tiny plaque reading "Charleston, SC." Oh, no. Yes, I admit - the beachy themes are cute, but they can be found at any beach. I need a little more creativity. I ask a lot of my travel ornaments.
A thistle from Scotland
A scottie dog, also from, well, Scotland
Niagara on the Lake
Charleston in the foreground, Venice in the background
Biltmore Estate
My mother was in an ornament swap for many years. Both my dad and I have also, unofficially, been a part of the swap because we, too, have spent hours in planning, consultation, and construction of the ornaments each year. We are all partly sad but partly relieved that my mother gave up the swap a few years ago. It takes a great deal of time, but we do have an enormous amount of beautiful and unique handmade ornaments to show for our trouble.
I have quite a few of these on our tree - not only one each of the ones we constructed but also because I worked for the husband of another lady in the swap. Ms. Hope has always made extra ornaments to give away as gifts and I have often been one of the lucky recipients. One year I saw a very familiar homemade ornament at my dentist's office. I kid you not. Right then and there I knew that Ms. Hope also went to this same dentist - and I also knew she was Superwoman. Well, I had already known that, but this confirmed it. =)
There are quite a lot of ornaments that were part of my life before Jeremy entered the picture, but now we are collecting them together. I don't know if he's as excited about it as I am, but deep down, I think he approves. Deep, deep down.
My friend and former roommate Rachelle gave me these as a present a couple of years ago. Or last year? It all runs together. Anyway, Jeremy hung these this year and I thought it was so cute that he hung them this close together. I mean, I would have hung them "together," but more along the lines of being five inches apart. You know the rules. Hanging them so close to each other was surprising and sweet. =)
Now for our recipe. If you live in Tennessee, you need to know about Demo's. It's our very favorite restaurant, but there's not even one near us. But when we travel, we scheme up ways to make a stop there, usually in downtown Nashville - but sometimes Murfreesboro. There's also one in Lebanon, where his brother lives. (Come to think of it, we need to visit them more often.) And I believe there's one in Florence, AL. We haven't tried that one yet, but we need to add it to the list.
Demo's is an family-owned Italian steakhouse. But it's just more than that. You can even get chicken salad served in a pineapple half. And everything I've ever had there is incredibly delicious and plenteous. And not expensive! It's so, so good. The restaurants are pretty large, which is good because there is always a crowd. It's got brickwork inside and pretty gas lanterns, both of which I am a huge sucker for.
Jeremy almost always gets the chicken alfredo. I usually alternate between the garlic brown butter spaghetti (the menu notes it's "why Doris married Jim" - and I think it's totally a legitimate reason to marry someone) or the chicken salad. Whatever you get, you have the option for soup or salad. I always, always get the baked chicken soup. Because it's awesomely delicious. With the primary insights from my friend Heather (who is a lucky girl to live near a Demo's in Lebanon) I came up with the following recipe, which tastes almost exactly like the real thing. The lemon juice is the key. It was such an exciting discovery! Especially since the recipe is incredibly simple. Merry Christmas to me!
5-6 cups chicken broth (or more, if desired)
3 Tbsp. butter
1 1/2 cups Minute white rice
2 Tbsp. cornstarch dissolved in cold water
2 cups cooked chicken (more chicken than theirs has - already had it cooked/frozen. Also, mine was chopped in chunks; theirs is sliced)
juice of one large fresh lemon, or to taste
Italian spices, to taste (I used garlic powder, dried basil, thyme, oregano, poultry seasoning, and cumin)
salt and pepper, to taste
1/2 cup - 3/4 cup milk or half & half
Heat up chicken broth in stockpot. Dissolve butter, once broth is warm enough. Add rice (must be minute rice to cook quickly) - cover pot to bring to a boil. Keep boiling for another minute or two and then uncover and reduce heat to medium to add cornstarch (already dissolved in cold water), cooked chicken, and fresh lemon juice, starting with juice from just one half. You want to taste the brightness from the lemon without it becoming a "lemon soup." I played with the spices also...if you are doing the separate spices, as I did, give a generous sprinkling of each and adjust after tasting the soup. Add the salt and pepper, also testing to make sure the rice is done. You may simmer the soup for a bit and then add the milk or half & half to heat through just before serving. A green salad and cheesy bread (just like at Demo's) would be a wonderful way to round out this meal.
This is naturally a thin, brothy soup. I found that the soup thickened up considerably once cooled - since the rice soaked up more of the liquid. In reheating the next day, I added more chicken broth and a little more spices and lemon juice to thin it again.
And last of all...I promised you a song. All month I plan to be sharing my most favorite Christmas songs and this is one of those. I have fallen in love with it just this year. Brand new stuff from Dave Barnes...it may take a few seconds but it'll load. =)
My life is a work in progress, which is how I think God intended it to be. I love spending time with my husband Jeremy and am trying every day to be a good Christian wife. I am totally intrigued with cooking (especially baking) and enjoy feeding family and friends. I appreciate symmetry and design; correct spelling, grammar, and punctuation; and lovely harmonies in music. I feel more than kindly toward helpful people and strive to be one also. I adore laughing. I'm terribly glad I'm not colorblind. I like to be positive.