Thursday, December 22, 2011

Christmas Cheer: Salted Chocolate Toffee Squares


Ahem! Attention please. I've decided to magically create three more weeks before Christmas Day. I mean, I'm totally ready to see my family and (magically) I actually have all of my shopping done. But I've done a total of ONE Christmas Cheer post so far and I had BIG plans of blogging really often during December. There is just not enough time between Thanksgiving and Christmas. There's just NOT. (Hence the argument for blending holidays.) Even though I've listened to Christmas music since August and made ornament wreaths for the last six months, I should have heeded my own advice and decorated my tree two weeks before Thanksgiving. I didn't fully get the tree and mantel exactly how I wanted them until, oh, last week. (But now I do really, really love them.) And I finally made a mailbox topper, well, yesterday. And somehow during all this rain, I'm totally going to put up wreaths on our front windows because they make me happy. And they will keep on making me happy until at least mid-January. Unless I can come up with a Harry Potter spell to give me some time. Wait, I need Hermione's Time Turner...! Who's with me??

If you're also running short on time and need an easy, quick recipe that still promises marvelous results, I can definitely help you out today. (Because why would you want to spend any amount of time making something that's not marvelous?) I've made four recipes of this in the past two weeks. Two for a catering event, one for a birthday party, and one for Christmas presents. And it was marvelous every time. You don't even have to use a candy thermometer. Bonus.

It's just slightly adapted from a recipe my mother used to make often when I was little. She called them Butter Pecan Turtle Cookies, but somehow, I felt like changing the name. They're chewy and crunchy at the same time, with a layer of toffee that is so super good. Mmmm!


Let's commence with the actual recipe, shall we?


Salted Chocolate Toffee Squares
Makes one 9x13 pan

Crust layer:
2 c. all-purpose flour
1 c. firmly packed dark brown sugar
1/2 c. butter, softened (*I recommend using an unsalted butter and adding a flaky sea salt between the toffee and chocolate layers)
1 c. whole pecan halves

Toffee layer:
2/3 c. butter (*see note above)
1/2 c. firmly packed dark brown sugar
flaky sea salt, to taste

Chocolate layer:
1 c. milk chocolate chips (or use half milk chocolate and half dark or semi-sweet)

Preheat oven to 350 degrees. Combine the crust ingredients with an electric mixer until particles are fine. Pat firmly into a lightly greased 9x13 pan. Arrange pecans evenly, top side up, onto the crust, pressing them into it slightly. Set aside.

To prepare the toffee layer, combine butter and brown sugar in a heavy, medium-sized saucepan. (I recommend a non-stick pan.) Cook over medium heat, stirring constantly until entire surface begins to boil. (The mixture will start looking light - almost "fluffy.") Boil the mixture about 30-40 seconds, still stirring constantly. Immediately remove from heat and pour the hot toffee over the pecans and crust. You may need to turn the pan a few times to coat the edges of the crust. Place the pan in the oven for about 10-20 minutes, watching for the entire surface to become bubbly and the crust to become light golden brown. (My oven takes about 15-16 minutes.)

Remove from the oven, sprinkle evenly with sea salt, and immediately follow with the chocolate chips. (I won't tell if you decide to use a little more than one cup.) After a minute or so, they will have melted - slightly swirl the chocolate for a pretty finish. Cool on the counter for about 30 minutes and then in the fridge for about an hour. I recommend storing these at room temperature after letting them set up in the refrigerator. They can be *very* difficult to cut otherwise!

P.S. I would imagine that these would be perfectly fine with salted butter and no addition of sea salt. I just had a TON of unsalted butter that I got on a recent sale - so, of course, I used that.

This is what happens when your camera needs an extreme closeup.
You catch a whiff of chocolate and start thinking, 
"Um, yeah, that'd make a cute picture with a bite out of it..."

Tuesday, December 6, 2011

Christmas Cheer: $10 off Shutterfly Cards!

I've done only two photo Christmas cards in my life...scratch that - the first one I was thinking of actually ended up to be a "Happy New Year!" card with our wedding photos on it three years ago. (And what's wrong with that? Nothing, I tell you.) So, last year's photo card (see below) was our first actual photo Christmas card. And I loved it. And I loved receiving everyone else's photo cards. So much so that I keep them on our refrigerator year-round. Yes...I do. (And what's wrong with that? Nothing, I tell you.)

We got two photo cards in the mail yesterday and I was excited to trade out last year's pictures for the newer ones. But I'll always keep the old ones...in fact, I keep them *all* in a box and I go through them each year and reminisce. True story.

If you're a returning Shutterfly customer, (and I know a bunch of us were last year!) here's an opportunity for you to receive $10 off your order. So easy!

1. Sign in to Shutterfly.
2. Click on "My Shutterfly" in the top menu.
3. Under "My Projects," click on "View All Projects."
4. Click the selection button underneath the project you want to share.
5. Click "Share Project" on the right hand side of the screen.
6. Give the project a title and description and press "Next."
7. This page will show you the details for the $10 off promo, including the code (to embed on your site) and where to send the email.
8. Embed your code on your blog or website.
9. Send an email to the given address. You should receive an auto-response back - and then receive your $10 off code within 10 days.


Seasonal Chic 2010 Christmas Card
Turn family photos into personalized Christmas cards.
View the entire collection of cards.


Wednesday, November 23, 2011

Autumnal Cheer: Thanks Living


First of all, if you like hot tea and/or pumpkin spice flavored things, you need to check out this Bigelow Pumpkin Spice tea. Mmmm! My mom surprised me with it - and it is goo-ood. I think she bought it at Kroger...

Next of all, I have really enjoyed celebrating Thanksgiving all month by expressing gratitude in a series of Facebook stati (or statuses - what is really the proper term??) Though I didn't post every day this month, I wanted to pull together my list here in celebration of the actual day. It's a long, happy list - and I fully intend to keep expressing gratitude even when November is over. Hence, the title...Thanks Living. See what I did there? ; )

November 2nd: Today I'm thankful that God gives us stunning autumn colors in the form of pumpkins and pretty mums and changing leaves. I highly recommended walking (or driving) through the falling 
leaves and thanking God, right then and there, for his beautiful autumn idea.

November 3rd: Today I'm thankful for our families, who love to cook and laugh and spend time together. All year long, but especially around the holidays!

November 4th: Today I'm thankful for both a husband and a daddy who can always fix *anything* around the house! Right now Jeremy Hicks is replacing the rails and spindles on our side porch and it's looking SO good.

November 5th: Today I'm thankful for a brilliant Creator who inspires us to design and create things ourselves, just on a much smaller scale. =)

November 6th: Today I'm thankful for a sunshiney Lord's Day. Time to finish getting ready for worship! =)

November 8th: Today I'm thankful for a sweet, sneaky husband who surprised me with flowers and a card that made me cry happy tears before he left for work this morning. Happy third anniversary, Jeremy Hicks! =)

November 9th: Today I'm thankful for tastebuds and favorite flavors, mixed in lots of variations: basil, cilantro, chocolate, browned butter, garlic, lemon, roasted red pepper, olive oil, sesame, rosemary, vanilla, pumpkin, cranberry, parmesan. So many lovely flavors that God created!

November 10th: Today I'm thankful for words...the way they can paint pictures, express ideas, capture imaginations, and inspire to action!

November 13th: Today I'm thankful for so many Christian friends and family - you all encourage me, challenge me, and make the journey to Heaven *so* much more fun!

November 15th: Today I'm thankful that K-Mart, of all places, has PINK tinsel. Wait, change that to "had." I bought every bit of it - and then said a silly little prayer of thanksgiving in the parking lot that I'm quite certain God didn't think was silly at all. Pretty sure we're supposed to be grateful for the little things, too! =)

November 17th: Today I'm extremely thankful for all of these precious babies who have been born safe and healthy this year - Elijah (Ashley & Ethan), Tyler (Andrea & Paul), Ethan (Alyssa & Michael), Ellery (Ashley & Jason), Shelbie (Allison & Adam), and the latest of them early this morning - Adelae  (Sasha & Jared)! I am blessed to know you and yours!

November 18th: Today I'm thankful for fun holiday traditions. I'm ready to go to the Holiday Merchandise Mart with my mom a little later this morning!

November 19th: Today I'm thankful for the inventors of the hot glue gun, Bare Escentuals makeup, my electric kettle, and white chocolate popcorn.

November 22nd: Today I'm thankful for Better Homes & Gardens' Fresh Frasier Fir (not Fur) candle, for list-making tendencies, and for colors...especially red.

November 23rd: Today I'm thankful for a long table filled with yummy pizzas, visiting friends, and much laughter at Besso's last night. Sorry, we were the loud ones. =)

November 24th: Today I'm thankful for hope and grace and God's promises. Amen!

There's one more thing, though. I'm thankful for you, dear blog readers. I love that you come here and read what I write. I love that you encourage me on Facebook or in person. I really appreciate you, whether I know you in "real life" or not. I hope you have a simply fantastic Thanksgiving!

What are you thankful for? =)

Tuesday, November 22, 2011

Autumnal Cheer: Pumpkin Cream Cheese Muffins

First off, I have a cute autumnal story for you. One that I pulled out of my family lore just for your enjoyment. When my Aunt Claudia was little, she was confused about what one of her spelling words meant. She had to use it in a sentence, but she had to gather some information first. She asked my grandmother what "autumn" meant; my grandmother was busy ironing or something, so she quickly answered, "Well, it's the same thing as fall."

And so it came to be that my Aunt Claudia's homework read, "I will autumn down the hill."

I love that story! =) I think she moved to Florida solely to escape any mention of autumn ever again. Or maybe it was because of her allergies. Yeah, maybe that was it. (But we know the truth.)

Besides an adorable family anecdote, I also have a recipe for you today. True story. And it involves pumpkin because it is, indeed, that time of year! This is another recipe I found on Pinterest - it's from Annie's Eats. My friend Ashley D. had told me she pinned it *and* made it - and that it was wonderfully fantastic. She was correct. Oh, boy, was she correct!! These were the best muffins I've ever made. Seriously. They're incredibly moist, with the perfect amount of sweetness and spiciness, and a lovely balance of textures. They do take a little bit longer to put together than regular muffins, but they make two dozen large ones, so you get to have plenty for yourself and also plenty to share. Wonder of wonders!


Pumpkin Cream Cheese Muffins
Makes 24

Filling ingredients:
8 oz. cream cheese, softened
1 c. confectioner's sugar

Muffin ingredients:
3 c. all-purpose flour
1 tsp. ground cinnamon
1 tsp. ground nutmeg
1 tsp. ground cloves
1 Tbsp. plus 1 tsp. pumpkin pie spice
1 tsp. salt
1 tsp. baking soda
4 large eggs
2 c. sugar
2 c. pumpkin puree (I used 1 large can of pumpkin and enough applesauce to make up the rest)
1 1/4 c. vegetable (or canola) oil

Streusel topping ingredients:
1/2 c. sugar
5 Tbsp. flour
1 1/2 tsp. ground cinnamon
4 Tbsp. cold butter, cut into pieces (I used salted)

Instructions:
Combine the softened cream cheese and confectioner's sugar with an electric mixer until blended and smooth. You may want to shape this into a log and wrap in plastic wrap and aluminum foil. You can freeze this for 2 hours, which will help the cream cheese middle to stay put in the middle of the muffin while it cooks. This is only an option, though. I had fine luck just spooning the mixture in between layers of the muffin batter with no freezing beforehand. The cream cheese may rise to the top and spill out a little on some of them, but I didn't mind that.

Preheat the oven to 350 degrees F. Line your muffin pan with paper liners. Combine the dry ingredients (minus the sugar) in a medium bowl. Combine the eggs, sugar, pumpkin, and oil with an electric mixer on medium low. On a low speed, add the dry ingredients and mix until just incorporated.

To prepare the streusel topping, combine the sugar, flour, and cinnamon in a small bowl and cut in the cold butter with a pastry cutter until the mixture is crumbly. Keep in the fridge until ready to use.

Drop 1-2 Tbsp. of batter into each muffin cup. Add a dollop of the cream cheese mixture (or a frozen, sliced section) on top of it. Fill the muffin cups with the remaining amount of batter, completely covering the cream cheese. Sprinkle a generous amount of the streusel topping onto each muffin. Bake for 20-25 minutes. Let cool a little before serving; the cream cheese filling can get pretty warm!

Adapted from Annie's Eats

Monday, November 21, 2011

Autumnal Cheer: Merry Thanksgiving!


Each year, I can't help but notice that the Christmas season starts earlier and earlier. And while it's a little strange, yes, to see snow-laden trees in the aisles of Hobby Lobby while the August sun is still blazing outside, I can't help but notice that people get genuinely *angry* about this sort of thing.

"I absolutely cannot allow myself to put up my Christmas tree until the day *after* Thanksgiving," they say. "I like to celebrate *one* holiday at a time," they explain.

That's their valid opinion. But I feel just as strongly the opposite way that I want to say to them, "Bah Humbug. What's so wrong about blending holidays??"

There's a whole army of people out there who looove Christmas music and holiday movies...but only in their place, which is squarely between December 1st and before the stroke of midnight on December 25th.

I am not one of those people. I will tell you why.

1. I once had a (very nice, mind you) boyfriend who thought Christmas music was ridiculous. One of his arguments was, "If it's so great, why don't people listen to it year-round??" Um. Well. Ahem. The thing is, I might very well go bonkers if I had to listen to only "Rudolph the Red-Nosed Reindeer" for a solid month. (Or "Grandma Got Run Over by a Reindeer" for even 10 seconds.) But I get great pleasure out of my well-chosen Christmas music and it would make me very sad indeed if I only got to listen to it for 25 days out of the 365.


A few years back, my most-played song sets were Mindy Smith's "My Holiday" (Precious!) and Lee Ann Womack's "The Season for Romance." Last year my new find was Dave Barnes' "Very Merry Christmas," which has some great original songs that I just love. I cannot lie...I started listening to it in August of this year and I'm not tired of it yet. My latest find of 2011 is Michael Buble's (very cleverly entitled!) "Christmas," which is full of the standards but somehow they still feel all brand new. It's lovely. (Except for "Santa Baby" - it's bad enough when girls sing it. It's even creepier when a guy does.)


I have long loved Dolly Parton's "Hard Candy Christmas" (and Leigh Ann Nash's version, too). Coldplay's "Christmas Lights" and anybody's version of "River" - I love those in kind of the same way. They're not your traditional Christmas songs, but they make me feel something...and not in a sappy "Christmas Shoes"-kinda-way.

Most of the Christmas music is magical. I am all for more magic, all throughout the year.

2. I see the magic in autumn. You KNOW I do. ;) But I've been celebrating autumn since before the first wisp of cool air. And as much as I love fall, the leaves are no longer pretty. The pumpkin topiary is looking kinda questionable. I've been making spiced things and drinking hot tea for months! So, I have some questions...

3. I want to know if Christmas shopping is "allowed" to happen before Thanksgiving. What's the status on this? Because if you've shopped any Saturday in Decembers before, you know that it's not a jolly time. I would much rather browse at my leisure throughout the year - and if I want to buy someone a Christmas teapot in September, I want to have choices.

Hobby Lobby, bring out the wrapping papers! Display the red and green tableware! Stock the shatterproof ornaments so I can start making the wreaths!

4. What about planning? Is one allowed to peruse blogs and magazines for holiday food or crafts before Thanksgiving is over? No? Well, you are going to have one cramped December. If you're on Pinterest (follow me!) you probably have a board (or boards) for Christmas/holiday crafts/parties/food. If you're actually going to *do* any of these things, it's best to get started in November. At least. Well, not the food - unless you're just making a list and checking it twice.

If you have these bright ideas to embroider some tea towels, hand paint some ornaments, and completely revamp your holiday color scheme, you might was well not start it until this coming January. It'll finally be done for Christmas 2012. Here's why:

5. Work parties, church parties, fondue "White Christmas" parties, volunteer work, holiday book club meetings, Christmas parades, family get-togethers...it's all fun, but it's so much stuff to do in less than a month! Yikes!

6. So much to do that you don't have much time to sit in front of your tree, fireplace blazing, drinking peppermint hot cocoa, and watching "Elf" for the 30th time with your beloved.

7. Seventhly, let's think about how we celebrate Thanksgiving. Yes, it takes a little planning and preparation for the feast on the actual day. But it's not like it's reinvented every year - we know our recipes and we can prepare them with our eyes closed. My other favorite Thanksgiving tradition has become expressing thankfulness during the month of November. I keep my little list, full of big things and little things, and funny things and serious things, published on Facebook. (I'll share my whole list here on Thanksgiving Day.) I also really enjoy reading other people's lists. It's a wonderful time to be thankful, but is being thankful (and expressing it) only to be confined to the month of November?? And December is just to be full of food and toys and fun and no thankfulness for our bounty of blessings? ("I like to celebrate one holiday at a time." Hmmm...)

8. Speaking of food, aren't there a lot of overlapping foods between Thanksgiving and Christmas? Turkey and/or ham? Dressing? Cranberry things? Mashed potatoes? Even pumpkin sometimes. The food is much the same. Overlapping holidays...see, you've been doing it for years!

9. Which brings me to a proposition for the United States government. Can we please move Thanksgiving up to, say, the second week in November? Two weeks after Halloween should be plenty of time to get ready for Turkey Day. I mean, I'm not asking for the 2nd Monday in October, which is the Canadian Thanksgiving. Why is theirs so early, by the way? I need to know. (Also, while I'm asking, can we please do away with Daylight Saving Time? The fact that it starts getting dark so early is extremely sad, every single year.)

10. And finally, the Spirit of Christmas...I want to feel it year-round! Not just smashed into a little box labeled "December." Amen.

Thursday, November 17, 2011

Autumnal Cheer: There's a Tear in My Butterbeer


Yes, I made these cupcakes back in July, for tear-stained consumption after the premiere of the very last Harry Potter movie. No, I haven't posted about them until now - I didn't have time, for some reason or another. But - really - it's more appropriate even now. See, HP and The Deathly Hallows 2 was just released on DVD...and also, these cupcakes totally remind me of autumn. They were truly fantastic! Exceptional, even. I remember thinking the flavors would be perfect for Halloween or Thanksgiving, even though they (gasp!) don't involve pumpkin. Our friends Bethany, Mindy, and Brad were big fans of these cupcakes also, and they don't hand out compliments easily. Or...maybe they do, but I'm just trying extra hard to convince you how wonderful they are. You should make them - even if you've never HEARD of Harry Potter. (Who ARE you??!) You won't be sorry. Also, you should read the books. You won't be sorry. And you should watch the movies. Warning: sometimes you'll be sorry. They definitely got better with each installment.

I definitely wore my owl necklace that my friend Sasha made for me. 
And Jeremy accidentally wore his Ooltewah Owls T-shirt; I pretended that it was on purpose.

Brad and Mindy. Yes, we saw the Deathly Hallows in 3D, with Harry Potter glasses. 
Yes, they made their own (awesome) shirts. Brad's shirt is the funniest HP shirt I've ever seen!

Bethany and me. Sorry for the totally awful quality of this picture. 
The lighting in the movie theater lobby was questionable, at best. Why couldn't they have had some 
of those huge umbrella things like wedding photographers have? It's the least they could do.

Let's get back to the sweet stuff. This recipe came straight from amybites.com, who did a marvelous job creating it. I highly recommend that you go to her original post and follow all of her little tips and tricks. I usually have lots of extra notes on a recipe, but she was so thorough that I actually have nothing else to add! It's perfect, as is. =)


Butterbeer Cupcakes
Makes 18 

For the cupcakes:
.
2 cups flour
1 1/2 teaspoon baking powder
1/2 teaspoon baking soda
1/4 teaspoon salt
1/2 cup (1 stick) unsalted butter, softened
1/2 cup granulated sugar
1/2 cup dark brown sugar, packed
3 large eggs
1 1/2 teaspoon vanilla
1 teaspoon butter flavoring
1/2 cup buttermilk
1/2 cup cream soda
.
For the ganache:.
1 11-oz. package butterscotch chips
1 cup heavy cream
.
For the buttercream frosting:.
1/2 cup (1 stick) unsalted butter, softened
1/3 cup butterscotch ganache
1 teaspoon vanilla
1 teaspoon butter flavoring
1/8 teaspoon salt
1 16-oz. package powdered sugar
Splash of milk or cream (as needed)
.
For the cupcakes: Preheat the oven to 350 degrees and line cupcake pans with paper liners. Combine your flour, baking soda, baking powder, and salt in a bowl and set aside. In a large bowl, cream your butter until light and fluffy. Add your sugars and beat until well-combined. Beat in your eggs, one at a time, mixing well after each addition. Then beat in your vanilla and butter flavoring.
.
Alternate adding your buttermilk, cream soda, and dry ingredients in batches until all are well incorporated. Fill each cupcake liner 3/4 full, then bake for 15 to 17 minutes until a tester inserted into the center comes out clean and cake springs back to the touch. Cool completely on wire racks.
.
For butterscotch filling: In a double boiler (heat-proof bowl over a pot of simmering water on the stove), combine butterscotch chips and heavy cream and stir until completely combined and smooth. Cool to room temperature. Fill a squeeze bottle with ganache and insert into the center of each cupcake, squeezing until filling begins to overflow.
.
For buttercream frosting: Cream butter in a large bowl until fluffy. Add in ganache, vanilla, butter flavoring, and salt and mix until well combined. Beat in powdered sugar 1 cup at a time until reaching desired consistency. Add milk or cream by the Tablespoon as needed. Frost cupcakes and top with a drizzle of butterscotch ganache.


Tuesday, November 15, 2011

Autumnal Cheer: Chocolate Acorns


I don't know if you've notiiiiiced, but Pretty Sweet has a new look as of a few days ago. I love the colors and the header so much! It was exactly what I was picturing; Kassie from Designs by Kassie did a fantastic job working with me on this project. I would recommend that you check her out if you're looking into a blog redesign. =)

I've got a couple of more weeks to post in my Autumnal Cheer series again this year. (You can find last year's posts here.) I'm going to try to make the most of it! First off, I want to show you some sweet acorns that my mother made for a church get-together a few weeks ago. She got the idea from a magazine, the name of which I cannot remember right now...I was impressed by how adorable and easy these were to make. I'm envisioning them at fall wedding showers or receptions or on a Thanksgiving dessert table. Super cute! And there's not a real recipe; I won't insult your intelligence.

All you do is melt a small amount of chocolate chips in the microwave. Using that as "glue," stick a Hershey kiss to one side of a mini Nutter Butter. Stick a whole chocolate chip to the other side. Make a bunch more. Ta da! Feel as clever as Martha Stewart, without all the extra work. ;)


Happy Fall, y'all!

Tuesday, November 8, 2011

A Third (and Fourth) Anniversary


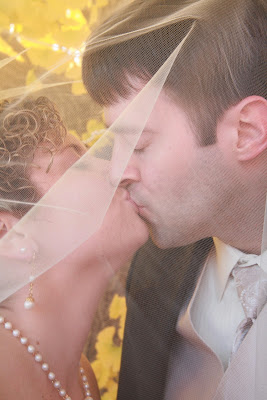
Happy third wedding anniversary to my husband, Jeremy. Today, I'm remembering the chilly weather...our excited friends and family gathering around us...the huge yellow gingko tree...the white pumpkins and yellow mums and red berries...the song the bridesmaids walked down to...the hot apple cider and that delicious almond wedding cake...the feeling of finally wearing my wedding dress...and finally seeing my handsome groom. As everyone always says, the day passed too quickly, but I was glad somebody had told me it would. Because I made sure I was fully in the moment during our ceremony. I remember what my grandaddy said and what my daddy said...and what you and I promised each other. I wasn't nervous. I was calm. 

During the three years since, I haven't always been so calm. Because THE WEDDING, decidedly, is not what a marriage all about, even if the magazines and the blogs make it seem that way. It's about real life, day to day. And reality is messy and confusing and difficult. But when you're there, holding my hand through it all, I know that calm once again. The feeling that comes over me and tells me that we're right together. That even though we don't have everything in the world in common, we do have the most important things in common. And today, we're celebrating that. =)

In fact, we're celebrating an extra year of such, because we met four years ago this very week. So, in addition to the wedding details, I'm remembering seeing "Beauty and the Beast" in Loyd Auditorium and eating taco soup with Megan and Mark...I'm remembering you repairing my broken necklace and us sitting knee to knee at the FHU Homecoming basketball game. I'm remembering a nervous first kiss before you headed back to Chattanooga. And I'm remembering that before you came back to visit in another two weeks, I already knew you were "The One." Exactly one year later, we got married. 

It's been beautiful - not just the wedding, but the process of our lives getting entwined. I love you, with much love, always! Thank you for asking me to be your wife.


Monday, October 17, 2011

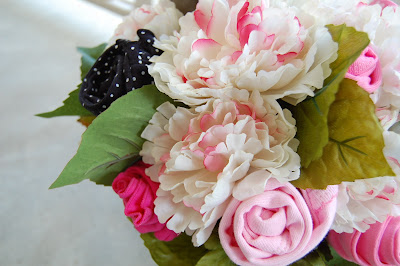
Baby Shower Onesie Bouquets


This past Saturday, our sweet friends Ashley and Jason welcomed their first baby into the world. We are so excited for all three of them and know that they'll be awesome parents to little Ellery Kate. (Her name is pretty great, right?? I think it's lovely.) Most likely, this little one will grow up to have a quick sense of humor, along with a love for others, especially those in need. She'll be smart and crafty and organized and a good worker. She'll probably make a mean cupcake. And of course, she'll be stinkin' cute, because Ashley and Jason are such a handsome couple. =) Right away, she'll be very well dressed. The outpouring of love in the form of an incredible number of gifts and guests at their church baby shower was a great indicator of how much people think of Ashley and Jason. We are fortunate to count them as close friends.


I was honored to help hostess this baby shower in September and I offered to do the decorations. So, thanks to Pinterest for this sweet idea...a fun baby shower gift that's, at once, decorative - and ultimately, pretty useful also. I've now made two of these - one for Ellery Kate and the other for another "first baby" for our good friends Sasha and Jared. (Her name will be Adelae Grace; my friends are picking some superb names lately!) Both projects were incredibly fun and fairly quick. Bonus! (Speaking of Pinterest, I hope to have a Pinterest button on the blog soon...it's in the middle of a autumn redesign, which I'm pretty excited about. Woo hoo!)

A funny story involving this project...I got a thank you note from Ashley after the shower and I handed it to Jeremy to read. At one point he paused and said, "She's using words I don't even know! O-niece? O-nee-see?" I couldn't *imagine* what he was talking about, but after a quick peek at the note, I started laughing hysterically. I guess Jeremy had never seen the word "onesie" written out...

I shared that story on Facebook a few weeks ago and my friend Lindley said her husband had sounded it out the same way...and then said, "I guess I'm looking at the Spanish side of the package..." Oh, the laughter!!


Onesie Bouquet Tutorial

Materials needed:
*medium-sized flower pot...any color and design you wish!
*styrofoam block
*knife or box cutter (for cutting styrofoam)
*hot glue gun (I highly recommend a low-temp one)
*heavy floral wire covered with floral tape (needs to be sturdy; these will be the stems)
*wire cutters
*assortment of baby onesies/matching pants, baby washcloths, and/or baby socks (all in the same color scheme). I used three sets of onesies/pants, three onesies or pants in each set.
*one bunch of "permanent flowers" with plenty of leaves attached
*floral tape, preferably green

Instructions:
1. Heat up glue gun; cut styrofoam into two smaller blocks that will fit (one on top of the other) into the pot. Glue pieces together, mainly on the edges. You don't want to make it it impossible for the floral wire to pierce through a thick smear of hardened glue. Attach the styrofoam pieces into the pot, pressing down well until adhesive is dry and blocks seem sturdy.

2. Cut floral wire to desired length. I think mine were about 9-10 inches long. Make a small loop at one end; this will help anchor the onesie rosette and also help keep it from snagging the fabric. (Good idea, Jeremy.)

3. Lay first onesie upside down and fold both sides over, much like tucking the sleeves back when folding a shirt. Place first piece of floral wire (loop side up) on the tush-side of the onesie and start rolling it up, fairly tightly. When you've finished rolling it, secure with a generous strand of floral tape. (If you've never used floral tape before, it works best when pulled and wrapped at the same time - it only becomes sticky when it stretches and then sticks to itself.)

4. Insert onesie rosette into the styrofoam. Continue making the rosettes and arranging them in a pleasing color pattern into the pot. Take care to not pierce any fabric with the floral stems.

5. After the onesie rosettes are completed and placed, cut several of the "permanent" flowers and insert them into the arrangement for visual interest. You will want to cut off the leaves from the stems and tuck them around the edge of the pot  to cover any of the floral tape. Tuck a few leaves into the middle of the arrangement, too, if you have enough. I did not anchor these with glue or anything because it's a temporary arrangement. I had no problem transporting it with everything staying in place. =)

6. Admire your handiwork and take some pictures you "secretly" hope will end up on Pinterest. ;)


Coming up soon...more baby shower projects! 


Monday, September 26, 2011

A Wedding One Year Ago


On a warm, late-summer day one year ago this past weekend, there was a pretty outdoor wedding. The groom was my cousin Adam. This guy can usually be found at Four Seasons Nursery (where he loves helping people with their landscaping quandaries) in Carhartt overalls, sunglasses, and a cap. But on that day, his bride Tosha talked him into wearing a tuxedo - and he looked pretty handsome, don't you think?

Tosha, of course, was pretty beautiful herself. Our family is blessed that Adam found her! I knew it was going to work out when I first heard Tosha doing a spot-on impression of Adam. The same Adam who is usually the one doing the hilarious, spot-on impressions of other people. Yes. It was pretty awesome.

Oh! Let me show you one of their engagement picture that was perfect. See, Tosha teaches spin and weight classes and she's won first place (thankyouverymuch) in a fitness competition last year. And I already told you about Adam, so this picture is very appropo. I love it!


Here's some more pictures from the wedding. Jeremy and I took turns taking these...

Grandaddy performed the wedding. =)

Bless her heart. Tosha's niece Tessa was exhausted 
and slept through most of the wedding on my lap. 
As the wedding director, I was just so glad to get her down the aisle! Ha!

Adam's sister Beth and good friend Josh - or Jug, as he is called in real life.

My dad and I designed the programs. =)

Cousin Nick and Aunt Claudia, who got an "empty" program. 
Now, some volunteers in our family hand-folded those...who left this one in there?? Ha!

Pretty cake!

Pretty girls!

Jeremy and me with the happy couple

Happy Anniversary, you guys! You might have already found out that the first year of marriage is both blissful and frustrating. We remember. ;) And we're cheering you on. Love you both! May you have many more very happy years together. =)

Friday, July 22, 2011

Radish Chive Tea Sandwiches with Sesame and Ginger


Not very long ago, I wasn't so sure I liked radishes. Luckily, my friend Bridget surprised the tea party committee with this intriguing tea sandwich recipe and everything I thought I knew about radishes vanished into thin air. Every one of us loved the slightly spicy taste of these and the general prettiness of the radish rounds decorating the top. It was a perfect addition to our tea menu this year!


Radish-Chive Tea Sandwiches with Sesame and Ginger

Yield:  Makes 16 servings

Ingredients:
4 tablespoons salted butter, room temperature
3 tablespoons minced chives, divided
1 tablespoon toasted sesame seeds
¾ teaspoon peeled and grated fresh ginger
¼ teaspoon Asian sesame oil
salt and pepper, to taste
3-4 radishes, thinly sliced

Mix butter, 2 tablespoons chives, sesame seeds, ginger, and oil in small bowl; season with salt and pepper.  Spread butter mixture over each bread slice.  Trim bread into desired sandwich shape, such as squares or rounds. Top with radishes, overlapping slightly. Sprinkle with remaining chives. Serve sandwiches open-faced.

Recipe adapted from http://www.epicurious.com/recipes/food/views/Radish-Chive-Tea-Sandwiches-with-Sesame-and-Ginger-241846

Sunday, July 3, 2011

Yeesh.

You're gonna have to excuse me and my computer issues...I've got some technical glitches and I'll be back (with all the catch-up work - ha!) in a couple of days. =)
Happy Fourth! ;)

Saturday, July 2, 2011

July 2: A Delay. I Know...

Yeah, Day 2 of my July blogging challenge and I have a perfectly good post saved as a draft...and no pictures showing up, so here's a promise for two posts tomorrow. Now = time for sleep. Past time.

Friday, July 1, 2011

July 1: You, Too, Miiight Be Able to Grow a Pineapple

Well, borrowing the idea from Kristi Montague, I decided I needed a swift kick in the pants to get back on a decent blogging schedule...which means that I have big plans to blog for the 31 days of July. (Be sure to check out Kristi's Indian-inspired photoshoot for July 1st.) I've got so, so, so much to tell you this month...I mean, seriously.

I need to ask you...do you live in Hawaii? Yeah, I don't either. When you live in Tennessee, you don't see many pineapple plantations scattered around, BUT...you can still grow a pineapple - because obviously we live in an almost tropical climate ourselves. (O.K., not really, but it certainly feels like it.) When I found this out (thanks to my Aunt Becky) I became Very Excited. We tried it - and it works. Well. I mean, we haven't *eaten* the pineapple yet, but it's coming along.


See? Is that not one of the cutest plants you've ever seen?? You cannot dissuade me from thinking so. Don't even try.

All you do is twist off the top of a pineapple (you *do* have to buy a pineapple to get a second FREE pineapple) and remove any fruit bits (or it could cause the plant to rot) and plant it in a pot with well-draining soil. You may also want to root it in water first if you prefer. In the colder months, keep it inside near a window with plenty of light and water it about once a week. When it gets warm, move it outside and water more frequently. It does need to be able to dry out between waterings or the leaves start to turn yellow. (Not that we have any experience with that.)

Here's the catch...it may take up to TWO YEARS to grow a pineapple. So, if you were ever wondering why pineapples are so expensive, well, there's your answer. We've been growing this one for a year - or maybe a year and a half...we really can't remember. Over a month ago, we noticed that teeny-tiny pineapple starting to form. It was an exciting day and I almost couldn't believe our good fortune.

I don't know exactly what's up with it right now, but it looks healthy, if very stemmy. According to some "very scientific" journals on the subject, we might call this a teenager pineapple.


Since I don't have much interest in eating the top part, though, I certainly hope the fruity part has a growth spurt soon. I'll keep you updated.

P.S. Ms. Ethel, a lady we go to church with, has planted two pineapple plants in the past and says the pineapples she got from them were SO sweet and so much better than the ones from the store. Crossing my fingers that I can soon say the same!

Monday, June 13, 2011

Hicksville Happenings

Lately, I've kind of been taking a blogging break. Not really intentionally, but it just kinda happened that lots of things were going on all-at-once and I just didn't know what to write about. Because there was too much to write about and not enough time. I like to write, but I can't usually just whip something out and press "Publish Post." But I'm going to make myself do that. At least today. We'll see how it goes.

I like to read other people's posts with random lists of their thoughts or what they're up to or just...whatever...that day. So...I will be a copycat.


1. I am OBSESSED with our plums trees in the yard. I've been composing a whole blog post about them. I promise, it won't be as boring as it sounds. There will be plum jelly and plum cobbler involved. And lots of crazy adjectives, like "glorious." And gratuitous plum tree photography. I might frame some of it. I love the colors!

2. Our kitchen sink (and dishwasher) had some major problems last Wednesday night. When we had friends visiting after church. (Hello, Bethany, Brittany, Ian, and new baby Owen!) And people staying the night with us on Thursday night. I was going to cook for them, but I could not. The plumbing situation didn't get resolved until Saturday, but the glue on the new pipe fitting wasn't cured until Sunday, and though I slowed down with the cooking, I didn't completely stop everything, and we didn't use paper plates, so we had a truckload of dirty dishes, and even though I usually hate washing dishes, this conundrum drove me CRAZY. But I'm just glad that Jeremy was the one who fixed it. He ran a new line and tied it into the separate washing machine line, and how did I get so lucky to marry a handyman?? Amen.

3. I've just figured out how to spend less time on a blog post. More commas and conjunctions. Less full sentences.


4. This weekend I made individual blueberry peach crisps, following this recipe from last year. I used to always prefer chocolate over fruit desserts, but times, they are a'changin'. That stuff is excellent, especially when the fruits are squarely in season.

5. Jeremy and I got new smart phones. We actually stepped out of the Flip-phone Stone Age (seriously, we both had our phones for four or five - or six? years) and now have Droids. It's taken a little while to get used to them, but I think it's safe to say that they're working out quite alright. I love taking pictures with mine (8 megapixels!) and Jeremy has discovered Angry Birds. And we've both started playing Words with Friends and I'm not really even a game person.

6. This HOT weather is so stinkin' uncomfortable. I have been longing to visit a milder climate. Until September maybe.

7. Our little gardens (you may remember the cedar garden and the cardi-garden from last year) weren't doing too great. Again. Enter the addition of nitrogen, which was recommended from various sources. Here's what Jeremy came home from the Co-op with.


Phone picture...sometimes they're great...
sometimes I can't figure out how to turn off the flash.

Dried blood. Isn't that sweet? But the plants loooooooove it and want to marry it. It smells kinda like a dead animal.

8. Our Rose of Sharon has started blooming. I love those trees (or bushes?) for several different reasons...my parents had one outside their bathroom window years ago in Picayune, MS. So when we moved to TN when I was a baby, they planted another one outside their new bathroom window. They have several around their yard now and we have one big one and a few smaller transplants to find places for in our yard. 


I love the idea of them because of their name, too. When I was taking these pictures last night, I kept singing, "Jesus, Rose of Sharon" as I played with the last light of the day. (I just learned a few things about that song that you might be interested in, too.)


Doesn't this little branch look like it created its own corsage? It's so crafty.

Well, I have deduced that I need to limit my random lists to about three items in the future. You live, you learn.

Happy Monday!
Kristen