Thursday, September 5, 2013

Pumpkin, Bean, and Chicken Enchiladas


Yes, it's only September 5th and it's still hot outside in Tennessee, but I'm pretty ready for fall. Ready to pull out the colorful leaf wreaths and buy some funky pumpkins and drink some chai tea. Oh, and try new pumpkin recipes! Yes, please.

This is a different sort of pumpkin recipe than I usually try - it's a savory one. And I loved it! It messed with my husband's mind a bit ("I keep wanting it to be sweet!") but it was a total win for me. It's a pretty healthy recipe, too, though I added a bit more cheese and salt than the original recipe called for. I mean, you want it to taste good, right? ;)

Oh, and don't be looking for "pumpkin beans" at your farmer's market like my mom's cousin was going to do. It's pumpkin comma bean. =)


Pumpkin, Bean, and Chicken Enchiladas
Adapted from Ladies' Home Journal Family Favorites Volume 6
Makes 4 servings
Print-friendly version

2 tsp. olive oil
1/2 c. chopped onion (1 medium onion)
1 fresh jalapeno, seeded and finely chopped (optional - I left this out and added more chili powder)
1 15-oz. can pumpkin
1 1/2 to 1 3/4 c. water
1 tsp. chili powder (use more if not using jalapeno)
1 tsp. ground cumin
1/2 tsp. salt (may need to taste and add more)
1 c. red kidney beans, drained
1 1/2 c. chopped or shredded cooked chicken breast
1 c. shredded part-skim mozzarella cheese
8 6-in white corn tortillas, softened
Pico de gallo or salsa (optional)

Preheat oven to 400 degrees. Spray a 9x13 baking dish with nonstick cooking spray; set aside. In a medium saucepan, heat olive oil on medium high heat. Add onion and jalapeno, if using; saute' until tender, about 5 minutes.

Stir in pumpkin and add 1 1/2 c. of water. Cook and stir in chili powder, cumin, and salt. If needed, add more water to reach desired consistency.

Soften tortillas in the microwave between paper towels - or heat them individually in a nonstick pan. My tortillas were already soft and extremely pliable, which made them become too soft when the enchiladas were cooked, so I found it necessary to heat them a pan to crisp them up slightly.

In a large bowl, slightly mash the beans. Stir in half of the pumpkin mixture, the cooked chicken, and 1/2 c. of the cheese. Spoon a generous 1/3 c. of the bean mixture onto each tortilla. Roll them up and place them seam side down in the prepared dish. Pour the remaining pumpkin mixture over the tortilla roll-ups.

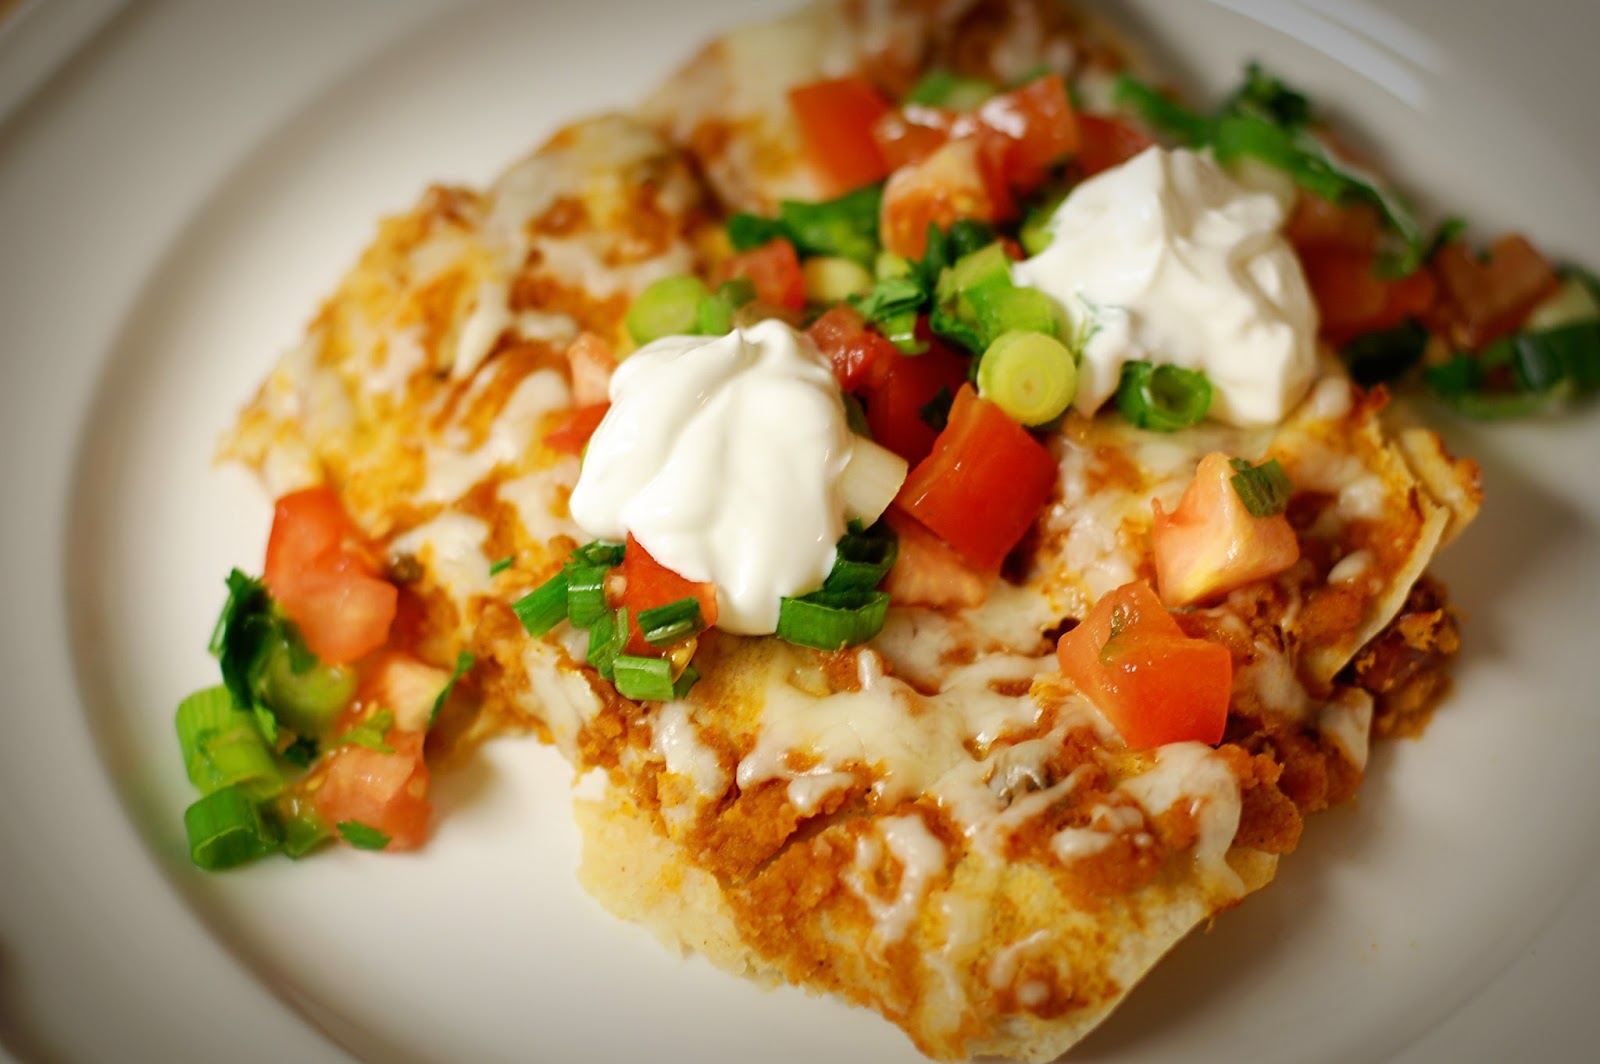
Bake, uncovered, for 15 minutes. Sprinkle with remaining 1/2 c. cheese. Bake 10 more minutes, making sure that cheese is melted. If desired, serve with pico de gallo. (A quick pico de gallo is made with equal parts chopped tomatoes and onions - I used green onions for this recipe. Add jalapeno, or not - I didn't this time. Throw in some chopped cilantro and sprinkle with salt and lime juice. Easy and flavorful!)


Tuesday, December 18, 2012

A Christmas Wedding

I was honored to design some decor for my friend Jen's Christmasy wedding this past Friday evening. The day was busy-busy-busy, but I made myself take a few minutes to photograph the auditorium and reception table decor...or I knew I'd be kicking myself afterward. =)

Everything we did was pretty simple but very festive - and it suited the couple perfectly. Both Jen and her new husband Jonathan love to read, so we brought some books in as part of the design.

We borrowed these hardback books and created dust jackets from tone-on-tone metallic wrapping paper.


I also used the wrapped books in the centerpieces for the reception tables. Instead of a poinsettia atop the stack of books, though, I filled glass bowls with coordinating Christmas balls and silver tinsel. Could it get any easier??


The auditorium pew markers also contained an element of the reading love theme. 


Using plain white (previously ugly) shatterproof ornaments, I modpodged strips of text from an old book (The Amy Vanderbilt Book of Etiquette, if you must know - and I totally enjoyed reading snippets of it while I was working on this project! Pretty hilarious.) onto them and then sprinkled clear and silver glitter to finish it off. It only took a bit of time - it wasn't difficult at all - but it was a great little touch, I think. Plus, they can be used for Christmas ornaments afterwards. I love that whole two birds/one stone thing. =)


Here's what the stage looked like. We taped icicle lights to the glass in front of the baptistry and covered them with white sheer curtains. I arranged a little semi-circle of poinsettias for Jen and Jonathan to stand in front of. I cannot wait to see the wedding photographer's pictures of the ceremony! The wedding was at 5:00pm, so the lighting was completely different than when I was snapping these pics. 


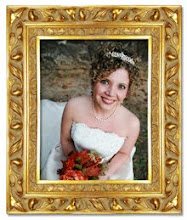
And here's one sneak peek shot from Starla Photography (she's fantastic - she shot our wedding, too!) I seriously cannot wait to see the rest of the pictures!


(Yes, I made that bouquet and boutonniere. Yay!)

Oh, and hey, here's another shot from Starla - I loved how the wedding colors turned out!


My friend Ashley made the wedding cake and it was both beautiful and so delicious. Yum! (Plus, she took this lovely picture of it.)


Happy Wedding, Jen and Jonathan! May God bless you guys with a long and very, very happy marriage! =)


Wednesday, November 21, 2012

Cranberry Pecan Pie


I haven't blogged in sooo long, but I just had to put this very excellent recipe out into the universe on this day before Thanksgiving. Those of you who are last-minute internet recipe gatherers need look no further. ;) But truly, it's a great Christmas recipe, too. Great for gifts, great for freezing! Honestly, it's super easy, just like a traditional pecan pie...except there's something better here. It's prettied up by the addition of fresh cranberries, becoming ever-so-festive - and the tartness is perfect. Because isn't regular pecan pie a little too sweet anyway? This adaptation just *works.*

I've made this pie many, many times over the last few years (I've even sold some) - and given out the recipe many, many times, too. Make it. You're gonna love it.

P.S. I always make a homemade pie crust, except for this one time last week when I was a little under the weather and decided to buy a pre-made one, as evidenced by the pictures in this post. But, seriously, my pie crust recipe is super easy and totally worth about 15 extra minutes of time to make it. I'm sharing it below, too.


Cranberry Pecan Pie
Slightly adapted from Taste of Home magazine
Print-friendly version

3 eggs
1 c. corn syrup
2/3 c. granulated sugar
1/4 c. butter, melted and cooled
1 tsp. vanilla extract
2 c. fresh (or frozen) cranberries
1 c. halved (or chopped) pecans
pinch of salt
deep-dish unbaked pie crust (recipe below)

Preheat the oven to 425 degrees F. Melt the butter and set aside to cool. Wash the cranberries and pat them dry. In a large bowl, combine the eggs, corn syrup, sugar, and vanilla - add the melted butter. Stir in the cranberries and pecans and pour into an unbaked pie crust. Bake at 425 F for 10 minutes. Reduce heat to 350 degrees; bake 30-40 minutes longer or until filling is *almost* set. Cool completely on a wire rack. Cover and refrigerate for several hours or overnight before slicing.


Easy Oil Pastry
Adapted from Betty Crocker's Cookbook
Makes one deep-dish pie crust
Print-friendly version

2 2/3 c. all-purpose flour*
1 1/2 tsp. salt
3/4 c. canola oil
4-5 Tbsp. cold water

Measure flour and salt into a medium bowl. Add oil and mix until particles are the size of small peas. Sprinkle in the cold water one tablespoon at a time, mixing until flour is moistened and dough almost cleans the side of the bowl. Press dough into a ball.

I don't roll out this dough - I just press it into the pie plate. (If you're using this dough for a different recipe that calls for a baked pie crust, just prick the crust all over with a fork and bake it at 475 degrees F for 12-15 minutes.) For this cranberry pecan pie, though, just press (or roll out, if you prefer) the dough, then pour the filling into it, and continue following the baking instructions above.

*From years of testing, I have decided that I prefer to use a mixture of White Lily flour and King Arthur flour (about half and half). I adore the lightness and taste of White Lily (it's my favorite flour) but the crust will be extremely crumbly. King Arthur gives it some needed togetherness. If this conversation seems somewhat fussy to you, I give you full permission to use whatever all-purpose flour you desire. ;)


Thursday, March 15, 2012

Literary Ladies: Her Mother's Hope

Bonnie, Sandy, and Ashley

Last fall, my friend Becky and I were excited to begin a women's book club at our congregation. Both of us enjoy reading to an absurdly enormous degree - and many of our friends do, too...and there were always the usual conversations among book lovers...exclamations over books that the others *need* to read!! And questions of what one should read next. And so, well-loved books traveled from household to household and back again. It was already an unofficial book club, really.

Becky and I have a blogging friend - Melissa, over at A Little Loveliness, and we got to spend some time with her last summer. One of the things we quizzed her about was the ladies book club at her own congregation. Her book club posts had inspired many conversations beginning, "Oh, we really need to start that book club!" (And then, sadly, going no farther.) She graciously answered all of our questions and encouraged us to begin. And so we did. And there was much excitement in the land. Besides the fun that a book club brings, we also are thrilled that it encourages fellowship with Christian ladies of all ages and also it can serve as an outreach tool. We love when any of our members invites a friend from the community!

As the slacker blogger than sometimes I am, this is only my first post about our own group, the Literary Ladies. (I kind of just love that name - the alliteration, the exact meaning of what we do and who is included. Though we were kind of tickled that Becky's grandfather responded to the first Facebook event that he could not come. So cute.) But Becky has posted about the previous two meetings, so I invite you to visit her blog to see how it all began...(P.S. Becky has also started another book club for her daughter and her friends. You can see posts about that on her blog also!)

At our latest meeting on March 1st, we discussed the book Her Mother's Hope by Francine Rivers. We had about 17 ladies in attendance (sadly, Becky couldn't come to this one because of a bout with strep throat). Even though many of us were up in arms about the actions of a certain Marta toward her daughter Hildemara, I knew that the book was now on almost everyone's well-loved list for one simple reason: the majority of the members had sought out the sequel, Her Daughter's Dream, and had already read it also.

In deep discussion...probably about grandchildren??

Trina and Dani

Visiting before the meeting began

Pretending to be all candid...

In keeping with a color scheme from the book, my friends Jen, Ashli, and Ashley helped decorate the tables with blue and yellow plates and napkins. We arranged daffodils in mason jars for the center of each table, which was really very perfect for our spring meeting. Also on each table, we placed some ceramic birds and a birds' nest and a yellow teacup, all of which symbolized different themes from the book. To complete the look, Ashley had brought handfuls of wonderful black and white pictures of her mother and grandmother, and she scattered those on the table also.


Since the book took place in various countries, we had quite a bit of freedom with what foods the ladies might bring to share. And if someone didn't have a specific Swiss/English/Canadian/American dish (!) they wanted to bring, they were asked to bring a dish that their mother or grandmother had taught them to make. My decorating committee had made little blue, yellow, black, and white tags for people to write the name of the dish and its significance to display on the food tables. Ladies also brought recipes to share, as one of the main characters had kept a journal of foods that other people had taught her to cook.


After we ate, we sang a few songs, and then one of our elder's wives gave a very good devotional to tie in with Her Mother's Hope. Since Becky was sick, Ashley stepped in to lead the book discussion, which was pretty lively. I guess there's just something about this type of family saga that inspires passionate commentary. ;)

We also discussed having some mini-meetings between our big, three-months-apart ones. We might start meeting here and there to have dessert, coffee, and book conversation. We also talked about the Literary Ladies assisting our congregation's Haiti book drive since we all support the value of books, obviously.

Before we adjourned, I announced the next Literary Ladies' "assignment" - A Lasting Impression by Tamera Alexander. I have actually not read this book yet, but Becky highly recommended it. The author attended Harding University in Arkansas and actually went to school with one of the members of our congregation. I very much look forward to reading it because it takes place in Nashville, Tennessee and the Belmont Mansion figures prominently into the story. Becky did a little scouting and found out that the mansion is having a special 195th birthday party on March 17th in honor of the lady of the house, Adelicia Acklen, who was real - and also a character in our book. There will be all sorts of fun and games and food and free self-guided tours of the mansion. So...the Literary Ladies will be taking their first field trip! The grandest thing, though, is that Becky wrote Tamera Alexander, the author of A Lasting Impression, and told her what we were doing...and she said she'd meet us at the mansion that day! How fun is that?? Well, verrrry. =)


Are you in a book club? Do you have any recommendations for us to read and discuss??

Monday, February 13, 2012

My Funny Valentine

Unless you know me in real life, you wouldn't know that something big has happened in the Hicks household...


We got a dog.

I've never had an inside dog, but since we had dogsat our friends' maltipoo, Lily, multiple times and loved it, we finally decided to adopt a puppy of our own. Auggie is about 5 1/2 months old and he's in the process of getting housetrained. He has just learned how to sit and is now mastering "stay." He looooves his rawhide bones and ALL of his toys - and lives for playing fetch. It's his favorite thing. Besides napping. And being rightnext to us.


Auggie is adorably precious and such a good snuggler. He's actually curled up right next to me on the couch as I write this post. He's a great addition to our household and everybody loves him. (Even if I have used more potty words in the last two months than I ever have in my adult life. Is this like being the mother of a toddler??)


But this post isn't totally about him. It's about my other Valentine - my first Valentine, my husband. Who cracks me UP. (He's also a great addition to our household and everybody loves him.) He and I had the following conversation this morning (a continuation in the *previously* ongoing search for Auggie's middle name):

Jeremy: What about Emerson?

Kristen: Auggie Emerson Hicks. I kind of like it. Like Ralph Waldo?

Jeremy: (Pause) Ralph Waldo who?

Kristen: Ralph Waldo Emerson. He was a poet.

Jeremy: (Quickly) Well, I didn't know it...(Laughter from both of us.) You set that up perfectly.

Kristen: Yeah, yeah. Well, Emerson after who, then? I want it to mean something.

Jeremy: It's the brand of our microwave.

And that, my friends, is how Auggie (probably) ended up with his middle name. As Jeremy says, "The microwave has lasted for sixteen years, so maybe Auggie will live that long, too." Here's hoping!

Thursday, December 22, 2011

Christmas Cheer: Salted Chocolate Toffee Squares


Ahem! Attention please. I've decided to magically create three more weeks before Christmas Day. I mean, I'm totally ready to see my family and (magically) I actually have all of my shopping done. But I've done a total of ONE Christmas Cheer post so far and I had BIG plans of blogging really often during December. There is just not enough time between Thanksgiving and Christmas. There's just NOT. (Hence the argument for blending holidays.) Even though I've listened to Christmas music since August and made ornament wreaths for the last six months, I should have heeded my own advice and decorated my tree two weeks before Thanksgiving. I didn't fully get the tree and mantel exactly how I wanted them until, oh, last week. (But now I do really, really love them.) And I finally made a mailbox topper, well, yesterday. And somehow during all this rain, I'm totally going to put up wreaths on our front windows because they make me happy. And they will keep on making me happy until at least mid-January. Unless I can come up with a Harry Potter spell to give me some time. Wait, I need Hermione's Time Turner...! Who's with me??

If you're also running short on time and need an easy, quick recipe that still promises marvelous results, I can definitely help you out today. (Because why would you want to spend any amount of time making something that's not marvelous?) I've made four recipes of this in the past two weeks. Two for a catering event, one for a birthday party, and one for Christmas presents. And it was marvelous every time. You don't even have to use a candy thermometer. Bonus.

It's just slightly adapted from a recipe my mother used to make often when I was little. She called them Butter Pecan Turtle Cookies, but somehow, I felt like changing the name. They're chewy and crunchy at the same time, with a layer of toffee that is so super good. Mmmm!


Let's commence with the actual recipe, shall we?


Salted Chocolate Toffee Squares
Makes one 9x13 pan

Crust layer:
2 c. all-purpose flour
1 c. firmly packed dark brown sugar
1/2 c. butter, softened (*I recommend using an unsalted butter and adding a flaky sea salt between the toffee and chocolate layers)
1 c. whole pecan halves

Toffee layer:
2/3 c. butter (*see note above)
1/2 c. firmly packed dark brown sugar
flaky sea salt, to taste

Chocolate layer:
1 c. milk chocolate chips (or use half milk chocolate and half dark or semi-sweet)

Preheat oven to 350 degrees. Combine the crust ingredients with an electric mixer until particles are fine. Pat firmly into a lightly greased 9x13 pan. Arrange pecans evenly, top side up, onto the crust, pressing them into it slightly. Set aside.

To prepare the toffee layer, combine butter and brown sugar in a heavy, medium-sized saucepan. (I recommend a non-stick pan.) Cook over medium heat, stirring constantly until entire surface begins to boil. (The mixture will start looking light - almost "fluffy.") Boil the mixture about 30-40 seconds, still stirring constantly. Immediately remove from heat and pour the hot toffee over the pecans and crust. You may need to turn the pan a few times to coat the edges of the crust. Place the pan in the oven for about 10-20 minutes, watching for the entire surface to become bubbly and the crust to become light golden brown. (My oven takes about 15-16 minutes.)

Remove from the oven, sprinkle evenly with sea salt, and immediately follow with the chocolate chips. (I won't tell if you decide to use a little more than one cup.) After a minute or so, they will have melted - slightly swirl the chocolate for a pretty finish. Cool on the counter for about 30 minutes and then in the fridge for about an hour. I recommend storing these at room temperature after letting them set up in the refrigerator. They can be *very* difficult to cut otherwise!

P.S. I would imagine that these would be perfectly fine with salted butter and no addition of sea salt. I just had a TON of unsalted butter that I got on a recent sale - so, of course, I used that.

This is what happens when your camera needs an extreme closeup.
You catch a whiff of chocolate and start thinking, 
"Um, yeah, that'd make a cute picture with a bite out of it..."

Tuesday, December 6, 2011

Christmas Cheer: $10 off Shutterfly Cards!

I've done only two photo Christmas cards in my life...scratch that - the first one I was thinking of actually ended up to be a "Happy New Year!" card with our wedding photos on it three years ago. (And what's wrong with that? Nothing, I tell you.) So, last year's photo card (see below) was our first actual photo Christmas card. And I loved it. And I loved receiving everyone else's photo cards. So much so that I keep them on our refrigerator year-round. Yes...I do. (And what's wrong with that? Nothing, I tell you.)

We got two photo cards in the mail yesterday and I was excited to trade out last year's pictures for the newer ones. But I'll always keep the old ones...in fact, I keep them *all* in a box and I go through them each year and reminisce. True story.

If you're a returning Shutterfly customer, (and I know a bunch of us were last year!) here's an opportunity for you to receive $10 off your order. So easy!

1. Sign in to Shutterfly.
2. Click on "My Shutterfly" in the top menu.
3. Under "My Projects," click on "View All Projects."
4. Click the selection button underneath the project you want to share.
5. Click "Share Project" on the right hand side of the screen.
6. Give the project a title and description and press "Next."
7. This page will show you the details for the $10 off promo, including the code (to embed on your site) and where to send the email.
8. Embed your code on your blog or website.
9. Send an email to the given address. You should receive an auto-response back - and then receive your $10 off code within 10 days.


Seasonal Chic 2010 Christmas Card
Turn family photos into personalized Christmas cards.
View the entire collection of cards.


Wednesday, November 23, 2011

Autumnal Cheer: Thanks Living


First of all, if you like hot tea and/or pumpkin spice flavored things, you need to check out this Bigelow Pumpkin Spice tea. Mmmm! My mom surprised me with it - and it is goo-ood. I think she bought it at Kroger...

Next of all, I have really enjoyed celebrating Thanksgiving all month by expressing gratitude in a series of Facebook stati (or statuses - what is really the proper term??) Though I didn't post every day this month, I wanted to pull together my list here in celebration of the actual day. It's a long, happy list - and I fully intend to keep expressing gratitude even when November is over. Hence, the title...Thanks Living. See what I did there? ; )

November 2nd: Today I'm thankful that God gives us stunning autumn colors in the form of pumpkins and pretty mums and changing leaves. I highly recommended walking (or driving) through the falling 
leaves and thanking God, right then and there, for his beautiful autumn idea.

November 3rd: Today I'm thankful for our families, who love to cook and laugh and spend time together. All year long, but especially around the holidays!

November 4th: Today I'm thankful for both a husband and a daddy who can always fix *anything* around the house! Right now Jeremy Hicks is replacing the rails and spindles on our side porch and it's looking SO good.

November 5th: Today I'm thankful for a brilliant Creator who inspires us to design and create things ourselves, just on a much smaller scale. =)

November 6th: Today I'm thankful for a sunshiney Lord's Day. Time to finish getting ready for worship! =)

November 8th: Today I'm thankful for a sweet, sneaky husband who surprised me with flowers and a card that made me cry happy tears before he left for work this morning. Happy third anniversary, Jeremy Hicks! =)

November 9th: Today I'm thankful for tastebuds and favorite flavors, mixed in lots of variations: basil, cilantro, chocolate, browned butter, garlic, lemon, roasted red pepper, olive oil, sesame, rosemary, vanilla, pumpkin, cranberry, parmesan. So many lovely flavors that God created!

November 10th: Today I'm thankful for words...the way they can paint pictures, express ideas, capture imaginations, and inspire to action!

November 13th: Today I'm thankful for so many Christian friends and family - you all encourage me, challenge me, and make the journey to Heaven *so* much more fun!

November 15th: Today I'm thankful that K-Mart, of all places, has PINK tinsel. Wait, change that to "had." I bought every bit of it - and then said a silly little prayer of thanksgiving in the parking lot that I'm quite certain God didn't think was silly at all. Pretty sure we're supposed to be grateful for the little things, too! =)

November 17th: Today I'm extremely thankful for all of these precious babies who have been born safe and healthy this year - Elijah (Ashley & Ethan), Tyler (Andrea & Paul), Ethan (Alyssa & Michael), Ellery (Ashley & Jason), Shelbie (Allison & Adam), and the latest of them early this morning - Adelae  (Sasha & Jared)! I am blessed to know you and yours!

November 18th: Today I'm thankful for fun holiday traditions. I'm ready to go to the Holiday Merchandise Mart with my mom a little later this morning!

November 19th: Today I'm thankful for the inventors of the hot glue gun, Bare Escentuals makeup, my electric kettle, and white chocolate popcorn.

November 22nd: Today I'm thankful for Better Homes & Gardens' Fresh Frasier Fir (not Fur) candle, for list-making tendencies, and for colors...especially red.

November 23rd: Today I'm thankful for a long table filled with yummy pizzas, visiting friends, and much laughter at Besso's last night. Sorry, we were the loud ones. =)

November 24th: Today I'm thankful for hope and grace and God's promises. Amen!

There's one more thing, though. I'm thankful for you, dear blog readers. I love that you come here and read what I write. I love that you encourage me on Facebook or in person. I really appreciate you, whether I know you in "real life" or not. I hope you have a simply fantastic Thanksgiving!

What are you thankful for? =)

Tuesday, November 22, 2011

Autumnal Cheer: Pumpkin Cream Cheese Muffins

First off, I have a cute autumnal story for you. One that I pulled out of my family lore just for your enjoyment. When my Aunt Claudia was little, she was confused about what one of her spelling words meant. She had to use it in a sentence, but she had to gather some information first. She asked my grandmother what "autumn" meant; my grandmother was busy ironing or something, so she quickly answered, "Well, it's the same thing as fall."

And so it came to be that my Aunt Claudia's homework read, "I will autumn down the hill."

I love that story! =) I think she moved to Florida solely to escape any mention of autumn ever again. Or maybe it was because of her allergies. Yeah, maybe that was it. (But we know the truth.)

Besides an adorable family anecdote, I also have a recipe for you today. True story. And it involves pumpkin because it is, indeed, that time of year! This is another recipe I found on Pinterest - it's from Annie's Eats. My friend Ashley D. had told me she pinned it *and* made it - and that it was wonderfully fantastic. She was correct. Oh, boy, was she correct!! These were the best muffins I've ever made. Seriously. They're incredibly moist, with the perfect amount of sweetness and spiciness, and a lovely balance of textures. They do take a little bit longer to put together than regular muffins, but they make two dozen large ones, so you get to have plenty for yourself and also plenty to share. Wonder of wonders!


Pumpkin Cream Cheese Muffins
Makes 24

Filling ingredients:
8 oz. cream cheese, softened
1 c. confectioner's sugar

Muffin ingredients:
3 c. all-purpose flour
1 tsp. ground cinnamon
1 tsp. ground nutmeg
1 tsp. ground cloves
1 Tbsp. plus 1 tsp. pumpkin pie spice
1 tsp. salt
1 tsp. baking soda
4 large eggs
2 c. sugar
2 c. pumpkin puree (I used 1 large can of pumpkin and enough applesauce to make up the rest)
1 1/4 c. vegetable (or canola) oil

Streusel topping ingredients:
1/2 c. sugar
5 Tbsp. flour
1 1/2 tsp. ground cinnamon
4 Tbsp. cold butter, cut into pieces (I used salted)

Instructions:
Combine the softened cream cheese and confectioner's sugar with an electric mixer until blended and smooth. You may want to shape this into a log and wrap in plastic wrap and aluminum foil. You can freeze this for 2 hours, which will help the cream cheese middle to stay put in the middle of the muffin while it cooks. This is only an option, though. I had fine luck just spooning the mixture in between layers of the muffin batter with no freezing beforehand. The cream cheese may rise to the top and spill out a little on some of them, but I didn't mind that.

Preheat the oven to 350 degrees F. Line your muffin pan with paper liners. Combine the dry ingredients (minus the sugar) in a medium bowl. Combine the eggs, sugar, pumpkin, and oil with an electric mixer on medium low. On a low speed, add the dry ingredients and mix until just incorporated.

To prepare the streusel topping, combine the sugar, flour, and cinnamon in a small bowl and cut in the cold butter with a pastry cutter until the mixture is crumbly. Keep in the fridge until ready to use.

Drop 1-2 Tbsp. of batter into each muffin cup. Add a dollop of the cream cheese mixture (or a frozen, sliced section) on top of it. Fill the muffin cups with the remaining amount of batter, completely covering the cream cheese. Sprinkle a generous amount of the streusel topping onto each muffin. Bake for 20-25 minutes. Let cool a little before serving; the cream cheese filling can get pretty warm!

Adapted from Annie's Eats

Monday, November 21, 2011

Autumnal Cheer: Merry Thanksgiving!


Each year, I can't help but notice that the Christmas season starts earlier and earlier. And while it's a little strange, yes, to see snow-laden trees in the aisles of Hobby Lobby while the August sun is still blazing outside, I can't help but notice that people get genuinely *angry* about this sort of thing.

"I absolutely cannot allow myself to put up my Christmas tree until the day *after* Thanksgiving," they say. "I like to celebrate *one* holiday at a time," they explain.

That's their valid opinion. But I feel just as strongly the opposite way that I want to say to them, "Bah Humbug. What's so wrong about blending holidays??"

There's a whole army of people out there who looove Christmas music and holiday movies...but only in their place, which is squarely between December 1st and before the stroke of midnight on December 25th.

I am not one of those people. I will tell you why.

1. I once had a (very nice, mind you) boyfriend who thought Christmas music was ridiculous. One of his arguments was, "If it's so great, why don't people listen to it year-round??" Um. Well. Ahem. The thing is, I might very well go bonkers if I had to listen to only "Rudolph the Red-Nosed Reindeer" for a solid month. (Or "Grandma Got Run Over by a Reindeer" for even 10 seconds.) But I get great pleasure out of my well-chosen Christmas music and it would make me very sad indeed if I only got to listen to it for 25 days out of the 365.


A few years back, my most-played song sets were Mindy Smith's "My Holiday" (Precious!) and Lee Ann Womack's "The Season for Romance." Last year my new find was Dave Barnes' "Very Merry Christmas," which has some great original songs that I just love. I cannot lie...I started listening to it in August of this year and I'm not tired of it yet. My latest find of 2011 is Michael Buble's (very cleverly entitled!) "Christmas," which is full of the standards but somehow they still feel all brand new. It's lovely. (Except for "Santa Baby" - it's bad enough when girls sing it. It's even creepier when a guy does.)


I have long loved Dolly Parton's "Hard Candy Christmas" (and Leigh Ann Nash's version, too). Coldplay's "Christmas Lights" and anybody's version of "River" - I love those in kind of the same way. They're not your traditional Christmas songs, but they make me feel something...and not in a sappy "Christmas Shoes"-kinda-way.

Most of the Christmas music is magical. I am all for more magic, all throughout the year.

2. I see the magic in autumn. You KNOW I do. ;) But I've been celebrating autumn since before the first wisp of cool air. And as much as I love fall, the leaves are no longer pretty. The pumpkin topiary is looking kinda questionable. I've been making spiced things and drinking hot tea for months! So, I have some questions...

3. I want to know if Christmas shopping is "allowed" to happen before Thanksgiving. What's the status on this? Because if you've shopped any Saturday in Decembers before, you know that it's not a jolly time. I would much rather browse at my leisure throughout the year - and if I want to buy someone a Christmas teapot in September, I want to have choices.

Hobby Lobby, bring out the wrapping papers! Display the red and green tableware! Stock the shatterproof ornaments so I can start making the wreaths!

4. What about planning? Is one allowed to peruse blogs and magazines for holiday food or crafts before Thanksgiving is over? No? Well, you are going to have one cramped December. If you're on Pinterest (follow me!) you probably have a board (or boards) for Christmas/holiday crafts/parties/food. If you're actually going to *do* any of these things, it's best to get started in November. At least. Well, not the food - unless you're just making a list and checking it twice.

If you have these bright ideas to embroider some tea towels, hand paint some ornaments, and completely revamp your holiday color scheme, you might was well not start it until this coming January. It'll finally be done for Christmas 2012. Here's why:

5. Work parties, church parties, fondue "White Christmas" parties, volunteer work, holiday book club meetings, Christmas parades, family get-togethers...it's all fun, but it's so much stuff to do in less than a month! Yikes!

6. So much to do that you don't have much time to sit in front of your tree, fireplace blazing, drinking peppermint hot cocoa, and watching "Elf" for the 30th time with your beloved.

7. Seventhly, let's think about how we celebrate Thanksgiving. Yes, it takes a little planning and preparation for the feast on the actual day. But it's not like it's reinvented every year - we know our recipes and we can prepare them with our eyes closed. My other favorite Thanksgiving tradition has become expressing thankfulness during the month of November. I keep my little list, full of big things and little things, and funny things and serious things, published on Facebook. (I'll share my whole list here on Thanksgiving Day.) I also really enjoy reading other people's lists. It's a wonderful time to be thankful, but is being thankful (and expressing it) only to be confined to the month of November?? And December is just to be full of food and toys and fun and no thankfulness for our bounty of blessings? ("I like to celebrate one holiday at a time." Hmmm...)

8. Speaking of food, aren't there a lot of overlapping foods between Thanksgiving and Christmas? Turkey and/or ham? Dressing? Cranberry things? Mashed potatoes? Even pumpkin sometimes. The food is much the same. Overlapping holidays...see, you've been doing it for years!

9. Which brings me to a proposition for the United States government. Can we please move Thanksgiving up to, say, the second week in November? Two weeks after Halloween should be plenty of time to get ready for Turkey Day. I mean, I'm not asking for the 2nd Monday in October, which is the Canadian Thanksgiving. Why is theirs so early, by the way? I need to know. (Also, while I'm asking, can we please do away with Daylight Saving Time? The fact that it starts getting dark so early is extremely sad, every single year.)

10. And finally, the Spirit of Christmas...I want to feel it year-round! Not just smashed into a little box labeled "December." Amen.

Thursday, November 17, 2011

Autumnal Cheer: There's a Tear in My Butterbeer


Yes, I made these cupcakes back in July, for tear-stained consumption after the premiere of the very last Harry Potter movie. No, I haven't posted about them until now - I didn't have time, for some reason or another. But - really - it's more appropriate even now. See, HP and The Deathly Hallows 2 was just released on DVD...and also, these cupcakes totally remind me of autumn. They were truly fantastic! Exceptional, even. I remember thinking the flavors would be perfect for Halloween or Thanksgiving, even though they (gasp!) don't involve pumpkin. Our friends Bethany, Mindy, and Brad were big fans of these cupcakes also, and they don't hand out compliments easily. Or...maybe they do, but I'm just trying extra hard to convince you how wonderful they are. You should make them - even if you've never HEARD of Harry Potter. (Who ARE you??!) You won't be sorry. Also, you should read the books. You won't be sorry. And you should watch the movies. Warning: sometimes you'll be sorry. They definitely got better with each installment.

I definitely wore my owl necklace that my friend Sasha made for me. 
And Jeremy accidentally wore his Ooltewah Owls T-shirt; I pretended that it was on purpose.

Brad and Mindy. Yes, we saw the Deathly Hallows in 3D, with Harry Potter glasses. 
Yes, they made their own (awesome) shirts. Brad's shirt is the funniest HP shirt I've ever seen!

Bethany and me. Sorry for the totally awful quality of this picture. 
The lighting in the movie theater lobby was questionable, at best. Why couldn't they have had some 
of those huge umbrella things like wedding photographers have? It's the least they could do.

Let's get back to the sweet stuff. This recipe came straight from amybites.com, who did a marvelous job creating it. I highly recommend that you go to her original post and follow all of her little tips and tricks. I usually have lots of extra notes on a recipe, but she was so thorough that I actually have nothing else to add! It's perfect, as is. =)


Butterbeer Cupcakes
Makes 18 

For the cupcakes:
.
2 cups flour
1 1/2 teaspoon baking powder
1/2 teaspoon baking soda
1/4 teaspoon salt
1/2 cup (1 stick) unsalted butter, softened
1/2 cup granulated sugar
1/2 cup dark brown sugar, packed
3 large eggs
1 1/2 teaspoon vanilla
1 teaspoon butter flavoring
1/2 cup buttermilk
1/2 cup cream soda
.
For the ganache:.
1 11-oz. package butterscotch chips
1 cup heavy cream
.
For the buttercream frosting:.
1/2 cup (1 stick) unsalted butter, softened
1/3 cup butterscotch ganache
1 teaspoon vanilla
1 teaspoon butter flavoring
1/8 teaspoon salt
1 16-oz. package powdered sugar
Splash of milk or cream (as needed)
.
For the cupcakes: Preheat the oven to 350 degrees and line cupcake pans with paper liners. Combine your flour, baking soda, baking powder, and salt in a bowl and set aside. In a large bowl, cream your butter until light and fluffy. Add your sugars and beat until well-combined. Beat in your eggs, one at a time, mixing well after each addition. Then beat in your vanilla and butter flavoring.
.
Alternate adding your buttermilk, cream soda, and dry ingredients in batches until all are well incorporated. Fill each cupcake liner 3/4 full, then bake for 15 to 17 minutes until a tester inserted into the center comes out clean and cake springs back to the touch. Cool completely on wire racks.
.
For butterscotch filling: In a double boiler (heat-proof bowl over a pot of simmering water on the stove), combine butterscotch chips and heavy cream and stir until completely combined and smooth. Cool to room temperature. Fill a squeeze bottle with ganache and insert into the center of each cupcake, squeezing until filling begins to overflow.
.
For buttercream frosting: Cream butter in a large bowl until fluffy. Add in ganache, vanilla, butter flavoring, and salt and mix until well combined. Beat in powdered sugar 1 cup at a time until reaching desired consistency. Add milk or cream by the Tablespoon as needed. Frost cupcakes and top with a drizzle of butterscotch ganache.


Tuesday, November 15, 2011

Autumnal Cheer: Chocolate Acorns


I don't know if you've notiiiiiced, but Pretty Sweet has a new look as of a few days ago. I love the colors and the header so much! It was exactly what I was picturing; Kassie from Designs by Kassie did a fantastic job working with me on this project. I would recommend that you check her out if you're looking into a blog redesign. =)

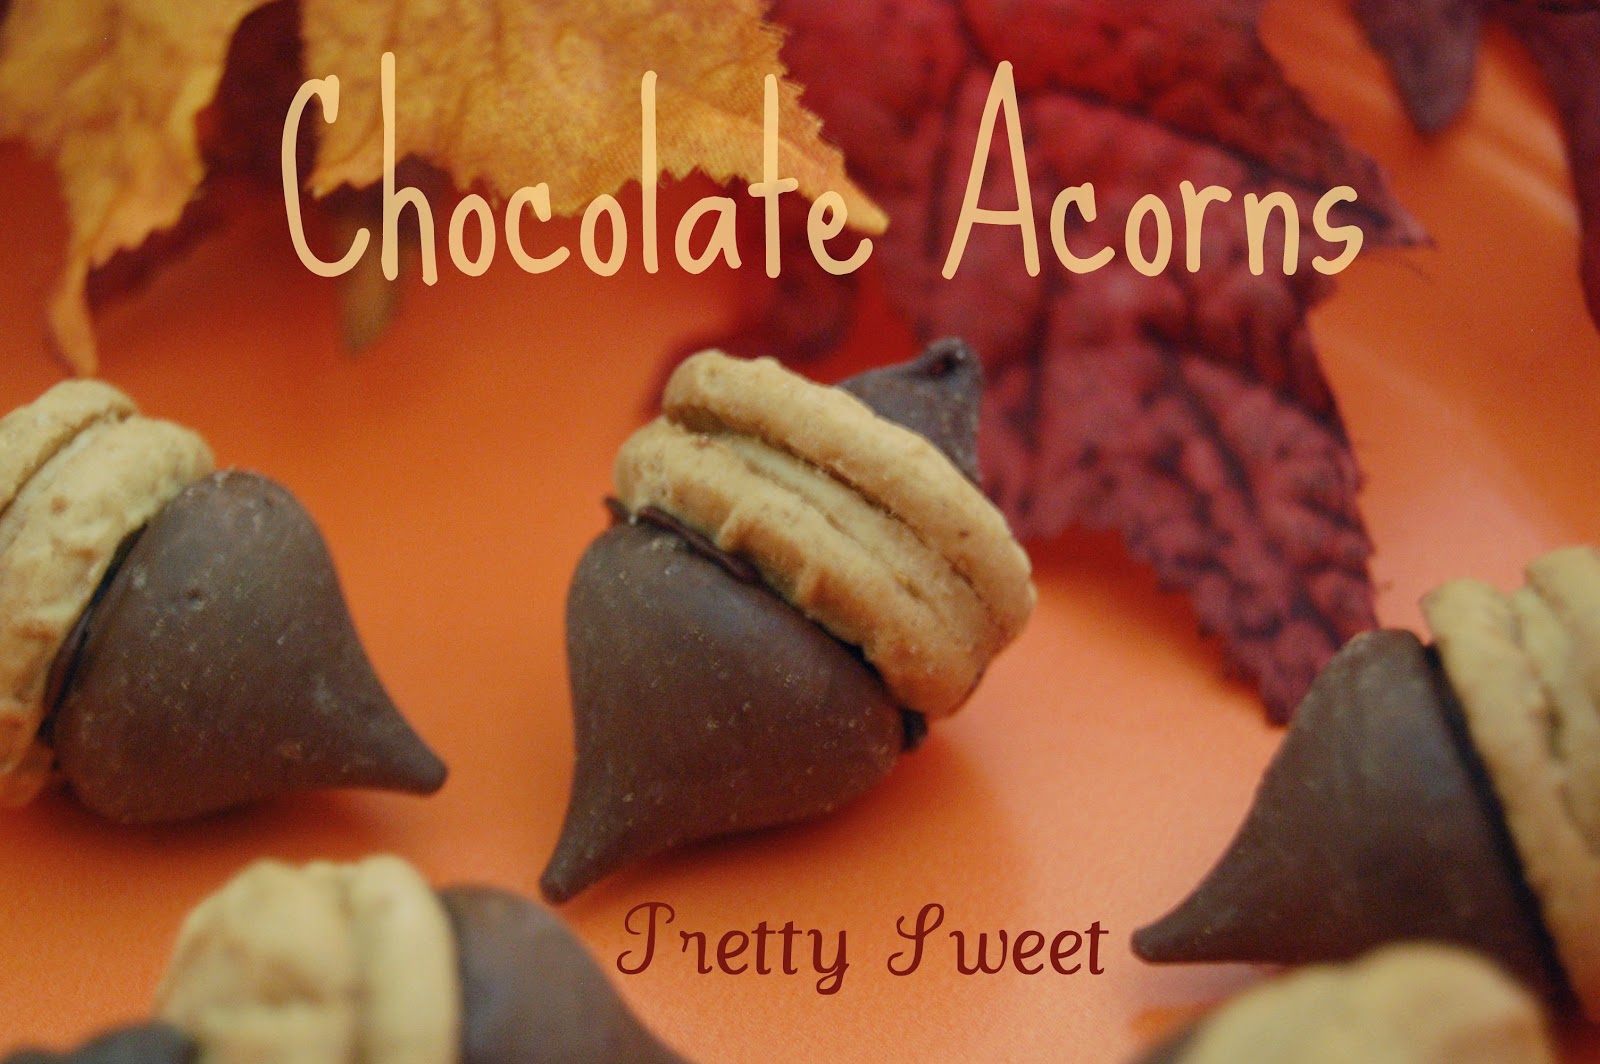
I've got a couple of more weeks to post in my Autumnal Cheer series again this year. (You can find last year's posts here.) I'm going to try to make the most of it! First off, I want to show you some sweet acorns that my mother made for a church get-together a few weeks ago. She got the idea from a magazine, the name of which I cannot remember right now...I was impressed by how adorable and easy these were to make. I'm envisioning them at fall wedding showers or receptions or on a Thanksgiving dessert table. Super cute! And there's not a real recipe; I won't insult your intelligence.

All you do is melt a small amount of chocolate chips in the microwave. Using that as "glue," stick a Hershey kiss to one side of a mini Nutter Butter. Stick a whole chocolate chip to the other side. Make a bunch more. Ta da! Feel as clever as Martha Stewart, without all the extra work. ;)


Happy Fall, y'all!